Pay attention to soap making and prepare a natural product at home, which, with the right ingredients, can be used in cosmetology. In addition, this is an excellent gift if it is additionally decorated with natural ingredients: flower petals, fruit seeds, glitter and pigments. In stores, such soap is very expensive, but it is much cheaper and easier to make it yourself. You can involve your loved ones in the work - it will be joint and exciting creativity. Today, the Homius editors review exciting master classes for beginners, during which you will get acquainted with basic soap-making techniques.
Beginners need to start making soap at home with a soap base. You can buy a ready-made composition, use soap or regular soap. It is better to cook the first copies without any additives, and over time you can start experimenting.
What you need to prepare for soap making at home
Before making soap at home, you will need the following components and tools:
- vessel for base;
- beautiful molds;
- cups, spatulas or spoons;
- alcohol.
Advice! Plastic or enamel dishes are suitable for soap making; metal surfaces are harmful to essential additives.
We will also need the following ingredients:
- ready-made soap base, which can be purchased in granules, pieces or shavings. For manual production, alkaline soap is sometimes used, which contains only oils;
- oils that affect the aroma and properties of the finished sample.
soap base
soap making oil
The following ingredients are often used as a supplement:
- abrasives;
- oil vitamins;
- bee products, such as honey;
- culinary spices;
- corn starch and sugar - they are necessary for better soaping and foaming;
- fruit and vegetable juices and yoghurt are essential to provide a hydrating effect.

soap making kit
How to make soap at home: a master class for beginners
We invite you to familiarize yourself with the principle of making soap yourself using a simple recipe.
| Illustration | Description of action |
 | Cut the base, put everything in a plastic jug and put it in. |
 | Pour warm base into a measuring cup, add coloring and mix. |
 | Add 12 drops of fragrance and mix. |
 | Add some glitter and mix thoroughly. |
 | Pour into silicone mold. To prevent the appearance of bubbles, you must immediately spray the surface with alcohol. |
Remove the finished soap for 2-3 hours in a cool place, but not in, after which it can be removed from the mold.
A more detailed master class on soap making at home for beginners can be seen in the video:
Step-by-step recipes for making soap-based soap at home for beginners
Beginners can try their hand at very simple recipes, and only after that experiment with more complex compositions.
Recipe 1 – surprise with rose petals
Before making 2 bars of soap at home, we will need:
- 150 g base;
- red dye;
- jojoba and rose oils;
- flower petals.
The work process is as follows.
- Cut and melt the base in the microwave.
- Pour in 3-4 drops of dye, 15 drops of jojoba and 2-3 drops of rose oil.
- Place the petals on the bottom of the silicone mold and fill with the prepared base. If necessary, you can use a spatula to distribute them evenly over the shape.


Recipe 2 – honey soap
To make fragrant soap with honey we will need:
- 150 g base;
- Saffron - it will act as a dye;
- oils: Monoi de Tahiti vanilla;
- 2 tbsp. l. honey;
- honeycomb-shaped molds.
Manufacturing procedure.
- Melt the base in any convenient way.
- Add a pinch of saffron and honey, stir everything.
- After the saffron colors the composition, add 2 drops of vanilla oil, then a little Monoi de Tahiti, mix, increase the dosage if necessary.
- Pour into molds and cool.


Recipe 3 – Strawberries and Cream Soap
This is a more complex recipe; for it we will need:
- the basis;
- 0.5 teaspoons of oils: olive and strawberry seeds;
- red dye;
- 40 g cream;
- aromas of strawberry and cream.
The procedure is complicated by the inclusion of a natural product at the end of mixing, otherwise the procedure is similar.


Recipe 4 – “Chocolate aroma” soap
For aromatic chocolate soap you will need:
- 40 g cocoa butter;
- 150 g base;
- 40 g sugar;
- chocolate aroma;
- molds resembling tiles.
Prepare the base, add all the oils and flavoring, mix and pour into the molds.


How to make soap at home from scratch using the cold and hot methods
Handmade soap is an environmentally friendly product that contains only natural ingredients. It can be adapted to any skin type and needs, in addition, it is much cheaper and healthier than store-bought. For many, this hobby turns into a means of earning money; it is important to understand the principle of soap making and study the effects of the components on the body.
Safety precautions when making soap at home from scratch
Before you start making soap at home with your own hands, you need to clearly know and follow safety precautions:
- since all work takes place with a hot base, children are better supervised;
- for work it is necessary to allocate separate dishes;
- when working with alkali, flavors and dyes, use a respirator, gloves, safety glasses, clothing must completely cover the body;
- before work, cover with film or newspapers;
- If the alkaline composition gets on your skin, you must rinse it thoroughly under running water with a 9% vinegar solution.

What you need to make soap at home from scratch: prepare the basic tools
For soap making, it is necessary to prepare various rubber, silicone or plastic molds that will give an unusual appearance to the aromatic pieces. It can be:
- culinary molds;
- children's sandbox molds;
- special molds for making soap at home;
- immersion thermometer blender.
Ready-made pieces in the form of fruits, animals or various geometric shapes look unusual. Dried inflorescences, ground salt, and salt are often used as additional components, which give a scrubbing effect.

How to make soap at home from scratch using the cold method
There are two ways to make soap at home: cold and hot; a novice craftswoman should try both and decide which one is better.
The peculiarity of cold soap making is that the base is not heated; alkali and water are used as a reagent.
The work order consists of the following steps.
- Pour lye into a container with ice water. There may even be pieces of ice in the liquid. In the cold method of making soap, deviations from the recipe are not allowed.
- After mixing the parts, you must wait until the reaction is completed, then pigments and oils can be added to the viscous mass. Their temperature should not differ from the base by more than 10°; for this, use a thermometer. If necessary, the components are heated in a water bath or in. At the very end you can add flavorings.
- Mix with a blender until the consistency of sour cream is achieved and pour into the mold.
- It will take at least 24 hours for complete hardening, after which the workpieces must be wrapped in cling film.

How to make soap from scratch at home using the hot method
The hot method of making soap “from scratch” at home involves mixing lye and water; the procedure is similar to the cold method. The process then proceeds as follows.
- Close the container with a lid and place in a water bath over very low heat, stirring every 30 minutes.
- After 3-4 hours, the gel-like mass is ready for further actions; it should not stick to your hands.
- Add pigments and flavors, mix and pour into molds.
- After 24 hours, the soap is removed from the molds and left for 1-2 weeks until completely hardened.

Master classes with recipes for beginners for making soap from scratch
The cold and hot methods differ in the “ripening” period, so if you plan to make it, you need to prepare in advance. We suggest using our recipes to cook several simple, but at the same time original bars of soap at home “from scratch”.
Recipe 1 – invigorating mint soap
To make 200 g of cold process soap you will need:
- electronic balance;
- 17.5 g alkali;
- 14.01 g coconut oil;
- 56.05 g olive oil;
- 70.06 g palm oil;
- 42.03 g water.
Let's look at the whole process in more detail.
| Illustration | Description of action |
 | Measure the lye into a separate container. |
 | Pour the lye into ice water and mix thoroughly. |
 | Measure all the oils into a container and heat them in the microwave. |
 | Pour the alkaline solution into the oil mixture; their temperature should not exceed 42°. |
 | Mix the composition with a blender, it homogenizes the mixture faster. For a liquid trace, 30 seconds are enough, to obtain a creamy mass it will take 10 minutes. |
 | Divide the composition into 2 parts, add titanium dioxide to one of them to decolorize. |
 | Add mint oil to both parts and mix thoroughly. |
 | To one part that has a yellow tint, add blue dye to give it a green color and mix. |
 | Add blue dye to the bleached part and mix. |
 | Place both parts of the composition into the mold in random order and compact. |
 | Use a spatula to apply sea waves to the surface and leave the soap for 24 hours to harden. |
 | Remove the soap from the mold, cut in half and leave to harden for 1 month. |

Recipe 2 – unscented baby soap with glycerin
You can prepare baby soap using the cold method, a recipe that young mothers will be happy to use. For this we need:
- 300 g olive oil;
- 120 g each of lanolin and glycerin;
- 175 g each of chamomile infusion and shea butter;
- the excess fat for this recipe is no more than 10%;
- 60 g sodium hydroxide.
The operating procedure is as follows.
- Mix the oils, prepare a solution with lye and pour it into the oil mixture. The temperature of each composition should be 37-42°.
- Use a blender to bring the mixture to a thick consistency.
- Place in molds and leave for a day until hardened. After 24 hours, transfer the pieces to polyethylene until the reaction is completed for another 1 month.


Recipe 3 – jasmine soap
We will prepare the next soap using the hot method. Before making soap from scratch, you need to create a recipe in a special soap-making program.

Let's look at the step-by-step master class in more detail.
| Illustration | Description of action |
 | Measure 150 g of palm oil, 128 g of palm kernel oil, 113 g of coconut, 23 g of stearic acid into a plastic container and place in a water bath or in. |
 | In a second container, mix liquid oils: 75 g each of rapeseed, grape seed, almond and olive, 20 g castor. |
 | Take 263 g of purified water, measure separately and pour into water: 15 g of salt and citric acid, 5.4 g of lactic acid. |
 | Measure out 122 g of alkali, pour in a thin stream into water with acids, stirring constantly. The window must be open. |
 | Pour all the oils into the pan, pour in the acid-base mixture through a strainer. The temperature of each composition should be within 38°-42°. |
 | Prepare fragrance from 19 g of jasmine oil, melt 53 g of superfat from shea butter. Remove the pan from the stove, add additional ingredients, 23 g of sorbitol to soften and stir. Then place in the mold. |
 | After 1-3 days, the soap can be removed from the mold and cut. |
For a more detailed master class on making soap from scratch, watch the video:
Recipe 4 – Castile soap
To make classic Castile soap from scratch we will need:
- 200 g olive oil;
- 95.2 g of cold, almost ice-cold water;
- 23.7 g of alkali.
The cooking process is as follows.
- Pour the lye into the ice water, stirring constantly.
- After the reaction is completed and cooled to 42°, pour the mixture into the olive oil and stir.
- Mix with a blender for 10-15 minutes.
After this, heat over low heat in an oven or in a water bath with constant stirring until a gel-like consistency is obtained, but for at least 4 hours.


Conclusion
Now you know how to make soap at home and how to calculate the recipe, and you can cook it from scratch. Thanks to our master classes with detailed descriptions, you will be able to make the most complex compositions. We hope that you will have exciting creativity that can become additional income. Experiment, include new components, making the creative process not only enjoyable, but also useful
If you have any questions, ask us in the comments, our craftswomen will be happy to answer them.
In conclusion, we invite you to watch and implement another interesting recipe for soap in the shape of a peacock.
We spend a lot of time on bath procedures. Because taking care of personal hygiene is very good and it undoubtedly has a positive effect on your health.
When taking a bath or shower, be sure to take your favorite scented soap with you. Many people don’t even think about what it consists of. But everything is simpler than that. Just today I will tell you how to cook this hygiene product at home.
Even a child can cope with this simple task. For some, having tried to make it once turns into a hobby, because it is not only pleasant to wash with your own product, but also safe. Because nowadays, due to the huge selection of products on the market, manufacturers are negligent in the manufacture of this product. Thus stuffing it with all sorts of harmful and, God forbid, prohibited chemicals in order to reduce the price of the product.
Once you master the soap-making procedure, you will be able to add only those ingredients that you like. You can impart an incomparable aroma. Having beautifully decorated it and made an original shape, it will not be a bad gift for various holidays, be it a birthday or March 8th. By doing this, you will undoubtedly surprise the person, because this gift is primarily made with your own hands.
Some people for whom soap making has become a hobby begin to slowly sell it, and therefore increase their budget.
First, you need to go to a specialized store and purchase a soap base. You can replace it with baby soap.
History of soap making
So let's begin our soap story, not just any soap opera, but the true story of soap.
It is believed that this hygiene product appeared around three millennia BC. The first time it was written about was 2200 BC. It was then that the Sumerians wrote about it on clay tablets, or rather about its production. Despite the fact that so many millennia have passed and similar manufacturing technology is used today.
There is one of the oldest documents, the Ebers Papyrus, which says that in ancient Rome they used a substance made from ash and fat to wash their hands. In order to improve the cleaning properties of soap, they began to add soda, or rather mix it with ash.
For a long time it was believed that soap came to us from Rome. Because the first soap factory was found precisely on the ruins of Pompeii. Quite a lot of time passed after people discovered the catch. The version they put forward turned out to be wrong. In fact, it was not a soap factory, but a so-called laundry (fullonika).

There is a belief in the world that the word soap originated from Mount Sapo located in Ancient Rome. In fact, this is nothing more than a legend, because such a mountain does not exist.
Soap was not always used for its intended purpose. For example, the Arab physician Avicenna prescribed this procedure to his patients when a person developed a rash or various skin diseases. He advised healthy people to use clay to cleanse their bodies.
In fact, what is produced now in factories can hardly be called soap, since synthetic additives are used in its production. And plant ash is almost never used today, because the purity of the product (ash) cannot be guaranteed. Also, the technology that was used before is very complex and takes a lot of time. Therefore, now, instead of ash, alkali is used.
Many people, when making soap, begin to abandon animal fats. They use components that have appeared not so long ago: for example CO2, silk, floral waxes and essential oils. Despite this, soap, which has been known to mankind for many thousands of years, remains to perform the same skin cleansing functions as before.
Essential Ingredients for Making Soap from Scratch
Probably almost every person who is going to learn soap making has thoughts running through their heads that it should not only be fragrant, but also have an original, unique shape.
In fact, this is the case, because when cooking, you can use various molds in the shape of hearts, favorite flowers or exotic animals. If you have specialized stores, you can even buy multilayer molds there, with which you can combine several colors in one blank.

Many people start using children's sandbox molds at the beginning. If you love baking, you probably have silicone molds; they are perfect for cooking.
You will also need two saucepans: a large and a small one to create a water bath. You will pour water into the large one and place it on the stove, and put the soap itself into the small one. By placing one inside the other, you can easily melt the workpiece. In general, you can use various devices for making a water bath. You can also melt the soap base in a regular microwave oven by placing the mixture in a plastic bucket or glass.
You will also need several plastic cups, toothpicks, a spoon or wooden stirring stick, an ordinary grater, a spray bottle of alcohol, and any paper towels or napkins.
We're done with the inventory, let's move on to the ingredients.
1.Essential oil.
If you want to give your soap a fragrant aroma and soften your skin, you cannot do without it. There are various scents on the shelves, it’s up to you to choose.
2. Dyes.

To dye your soap your favorite color, you need special dyes. They can also be replaced with natural ones, using vegetable or fruit juices. Personally, I used grapes, or rather their juice, but it’s up to you to choose.
3.Additives.
In addition to your favorite scent and color, you can include so-called additives in your soap. For example, to make a scrub, you can use crushed oatmeal, coffee beans or walnut shells. One of the popular additives is coconut flakes.
You can also use honey, lemon or cream. Various healthy herbs or berries dried from summer. In general, it all depends on your imagination.
4.Loofah (optional)
Using this ingredient you can make soap with a washcloth, so let's say 2 in 1.
I think we’ve sorted out the inventory, now let’s move on directly to the process itself.
How to make soap from soap remnants
Making soap from debris is very easy. It will take you very little time to make it. Today we will look at two product options - liquid and regular toilet.
For normal, you will need
- Pieces of old soap
- Molds
- Essential oil
- Vegetable oil
Preparation
1.Take the soap shards and collect them in a separate bowl.

3.The third step is to pour some water into the pan and put it on the fire. You will need to take one part water to one part soap.

4.After heating the water, pour our ingredient into the pan.
5. Stirring constantly, cook until it is completely dissolved in water.
6. Take vegetable oil out of the refrigerator and grease the molds with it.

7.Remove the pan from the heat and add a little essential oil to it for scent. Then we immediately pour it into molds.

8. Let the soap cool slightly and place it in the refrigerator until it hardens completely.

Your handmade scented personal care product is ready.
You can watch the video in more detail:
Good luck in your endeavors!
Liquid soap made from soap
A lot of soap remnants that have probably accumulated in your kitchen can be successfully turned into liquid soap. A small handful is enough to get about 1 liter of product. Can you imagine how much savings this is? So start immediately.

Ingredients
- Remnants
- Tincture of calendula
- Food coloring
- Glycerol
Preparation
1. First of all, put the water on the stove, it will boil and here we will arrange a water bath to melt the soap.

2. While the water is boiling, grate the soap. We need 50 grams per liter portion.

3.Add 1 liter of water to them and place in a water bath. You need to be prepared that the soap will not dissolve completely. There's nothing wrong with that.


4.When the main ingredients have dissolved, remove from the water bath.
5.The next step is to add calendula tincture, two tablespoons. If there is none, anything that contains alcohol will do, because that is what we need.

7.To make the color of the soap uniform and beautiful, add a little food coloring. A couple of drops will be enough.
8.Now pour in 4 tablespoons of glycerin. Its role is to increase viscosity and maintain the necessary moisture content of the soap. Our soaps are different in composition, but thanks to glycerin everything will mix.
9. Mix the resulting mass thoroughly. After the reaction has occurred, it is necessary to strain everything, because there are large pieces that have not dissolved. For this we use a sieve.

10.Pour the finished raw material into a bottle. It must be allowed to cool before use.
After the soap has cooled, a natural pearl will appear, it will be no worse than store-bought soap. More than that is even better.
This detergent can be used to wash not only your hands, but also dishes. And your mother and grandmother will be grateful to this.
A liter of liquid soap is ready, which we made from practically nothing.
Enjoy it for your health.
How to make soap from soap base
Above we looked at simpler cooking options. If you want to do this on a professional level, turn it into a hobby, or surprise your friends and acquaintances, then this article is just for you.
Today I'll show you how I pour small pieces of soap base into molds. This applies to plastic forms that have convex elements. They can be decorated with different colors.

Everyone does it differently, so my method is not the only correct one. I will pour soap with a snowflake.
You will need
- Plastic molds
- Soap base
- Dye
- Alcohol
- Fragrance
Let's move on to cooking
1. Melt the soap base in a water bath or in the microwave. Be sure to make sure the base doesn't boil.
2.After the base has become liquid, it can be painted with white dye. Make sure that it is not very hot, because many molds cannot withstand temperatures above 70 degrees.
3.You can use a food container to ensure that the mold stands up straight. Place a mold on top of it.
4.In order for the base to flow into small elements, the mold must be sprinkled with alcohol. After this, carefully pour the base so that it fills the snowflake. The excess can be removed with a toothpick after hardening, this will happen within 10 minutes.

5.Prepare a soap base for the main layer, we will make it blue. I will paint with a special dye purchased at the store.

6.When the resulting liquid has cooled, you can add fragrance to it and pour it into the mold.

7.In order to ensure good adhesion, you need to scratch our snowflake with a toothpick. Sprinkle with alcohol and pour. Spray with alcohol again to remove bubbles.
Well, that's all, you can wait until the soap hardens and you can take it out.
How to make soap from baby soap
Many people want to try to start making soap, but buying bases and other things is problematic. So if you want to do something useful for yourself, you can use children's.
You'll need
- Baby soap (without fragrances or dyes)
- Olive oil (can be sunflower)
- Pink clay (you can take a dried flower and grind it finely)
- Milk
Preparation
1.Grate the soap and place the plate in a water bath.


3.Pour one tablespoon of oil and mix.

4.Add pink clay, diluting it with water in advance. It will add color and better hold the consistency together. You can also use cocoa, turmeric, orange zest, etc. for color.

5.The next step will be flavoring, no more than 10 drops. You can use essential oil.

6. Take children's sandbox molds and put the resulting mixture into them. To get rid of voids, shake the mold a little.

7.Be patient and leave to dry. After a day, you can carefully remove it and leave it until completely dry for 1-2 days.

Well, that's all. I hope you liked the article. You can leave your questions and suggestions in the comments.
Secrets of soap making
- If you heat the base in the microwave, be sure to make sure it does not boil.
- Food flavorings should not be used together with essential oils.
- To prevent small air bubbles from appearing, spray the mold with alcohol.
- If you make soap in winter, take it outside to cool quickly.
- Add ground coffee beans or sugar to the product to create a scrub.
- The finished product should be stored for no more than six months to prevent it from drying out.
Several beautiful options

2.Heart


4. Starfish

5.Ice cream

6.Butterflies


I wish you good luck in such an interesting business!
Homemade soap is becoming increasingly popular because consumers believe in its naturalness. Indeed, industrial samples of cosmetic products contain a huge list of organic substances obtained through synthesis, and therefore the question of the benefits of industrial soap remains open. Making handmade soap at home is a tempting prospect because you will always know what it is made of. Homemade soap is safe to use and will not cause allergies or other skin diseases, will not harm the respiratory tract, etc. In pursuit of environmentally friendly homes, many take up soap making at home. In addition, this process is quite fascinating, and the results amaze with their unsurpassed beauty and wonderful aromas.
What is soap made from?
Judging by the list of ingredients of industrial soap, one might be mistaken that the homemade version will require many components. You can make the simplest soap with your own hands from a minimum of substances, and you won’t have to purchase complex equipment.
At first, it is worth purchasing ready-made soap base, vegetable and essential oils, medical alcohol, as well as natural flavors and dyes. If you have problems purchasing medical alcohol, then it will be possible to replace it with alcoholic tinctures of aromatic herbs by purchasing them at the pharmacy. By using the infusion, you can add an additional aromatic note to the soap, while the alcohol will do its job in the technological process.
The more experience a master gains in making soap with his own hands, the more he diversifies the ingredients, the more he experiments with dyes and aromatic compositions. The more interesting each new soap turns out to be, turning into a real masterpiece.
Amateur soap making uses the same set of equipment and appliances as in a regular kitchen. Equipment: scales for bulk products, blender, gas or electric stove, microwave oven. Ordinary pans made of chemically inert materials are also used - glass, stainless steel or enamel-coated. You will need soap molds, a measuring cup and a stirring spoon, which can be replaced with a glass rod.
Dishes and molds, as well as ingredients for making soap, can be purchased in specialized stores and soap-making departments. Silicone baking molds are also suitable, but it is important to remember: utensils used for soap should not be used for food purposes. This applies not only to molds for finished soap, but also to pots in which the solution is boiled.
The dishes in which the soap base will be prepared require special attention. You can also make it yourself, but the chemical reaction to produce soap is accompanied by several unpleasant moments, so it is important to first study safety precautions. Next we will consider in more detail how to make soap base at home. The devices for this process are the same, only you will have to add skin, eye and respiratory protection.
Photo ideas for homemade soap
Thanks to interesting molds and the inclusion of a variety of ingredients, you can get amazingly beautiful handmade soap. For a gift option, you can safely decorate the soap by mixing a transparent and opaque soap base, as well as fusing into it flower petals and sprigs of dried herbs, dried fruits and berries, colored soaps, etc. Learn how to decorate handmade soap well and bring it to life and you can enrich your ideas by looking at a photo gallery of finished masterpieces from experienced soap makers.


How to make soap base from scratch
The conditions of a home or apartment are quite suitable for preparing soap base. There is no need to purchase factory equipment or chemical laboratory furnishings, but this does not mean that making soap from scratch is as easy as using a ready-made base.
You will have to work with real alkali - a substance that can leave serious burns on the skin. You should first study the safety precautions for handling chemically aggressive substances. You will encounter aggressiveness as such when you dissolve dry caustic soda powder (aka alkali, caustic soda) in water. Even ice water becomes very hot when the ingredients are combined, because the reaction takes place with the release of a large amount of energy. Since water has a large heat capacity, it is into it that you need to gradually pour caustic, protecting your hands and face. It is necessary to ventilate during this process. If it is possible to prepare soap base in the courtyard of a private house or cottage, that’s even better.
It is worth diluting lye in the absence of children and pets. It is advisable to wear goggles and a respirator. If you have to prepare the soap base in the kitchen, then at this time any food should not be cooked or lying open there. Glassware for alkali is preferable; it is better to find a laboratory container so that there are no surprises during a violent reaction.
The diluted alkali must be poured into the prepared liquid fats (oils). You can use olive, palm, coconut, burdock oil. There are recipes for a mixture of various vegetable oils for a soap base. Some pork fat can also be added, but then the oils must be melted in a water bath and mixed before the saponification reaction. The oil mixture and the alkaline solution must be at the same temperature when mixed. It is desirable that it reaches 37–38° C.
Once the caustic has been poured into the oil mixture, you should start working with an immersion blender. It is worth mixing the components until “traces” appear, in other words, until the consistency of condensed milk, when a trace stretches behind a spoon dipped into it. This mixture must be poured into the mold and allowed to harden. This concludes the cold method of preparing soap base. Even when the mass hardens, it is not ready for use. You should remove it from the mold, wrap it in film and leave it to ripen for about a month.
If you need to use the soap base immediately, you will have to prepare it using a hot method. That is, we do not pour the soap mass into the mold, but place the pan with it in a water bath, where we keep it for about 4 hours. You need to stir the mixture once every half hour. In this case, superfatting additives are introduced into the composition at the end of its preparation; in fact, at the same moment, you can make the final version of the soap from this base, before it hardens, and pour it into shaped molds.
You can immediately add flavors and other useful ingredients to the soap base prepared using any of the methods. Refatting additives are made from vegetable oils. Essential oils are also added for scent and healing properties. Lanolin is introduced as a softening additive. It is better to introduce scrubbing fillers later, during the actual production of soap.
How to make soap at home
Now let's talk about how to make soap from a ready-made base. Even if you managed to make it yourself, you don’t have to immediately turn it into bars of soap. You can save it until better times, and when the need arises, say, to make gifts, take it out, cut it into cubes and start creating a unique masterpiece. You can do the same with a purchased base - grind it and put it in the microwave to melt.
When the base melts, you need to add a suitable dye, aromatic essential oils, dried herbal ingredients, and scrubbing substances. Essential oils are added last of all the components, because from a hot solution they will evaporate at lightning speed: these substances are too volatile.
You can use ingredients such as honey, tar, and decoctions of medicinal plants in homemade soap. To get soap with several layers, you need to prepare each layer separately and “assemble” the piece by wetting the surface of each layer with alcohol. Alcohol does not act as a glue, but removes air bubbles from the surface of the soap. The soap itself has adhesive properties, and, by the way, they are not bad.
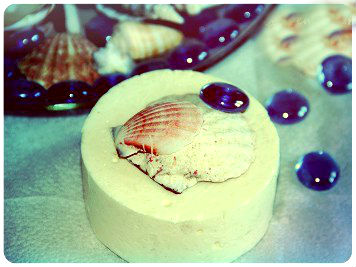
You can use different soap bases - clear and opaque - to make cake-like soap.
Soap making recipes for beginners
The invention of interesting colors, aromatic compositions and shapes, as well as the introduction of unusual ingredients, for example, loofah instead of particles of sand and clay for scrub, will help make soap making at home an interesting activity. Using interesting baking tins or shortbread cakes will also diversify the fruits of your activity.
You need to start with the simplest recipes, then move on to more complex ones. The more confident you are in making handmade soap, the more imagination you can apply to it and come up with your own variations. The first person who needs your homemade soap is a small child, so it is worth learning how to make baby soap, and then take care of the rest of the family. It may be useful for someone to use tar or honey soap to improve their skin condition.

What to choose from additional ingredients to create your own soap for your baby. It is worth remembering what is added to the bath when bathing. Tinctures of string, calendula, and chamomile are usually used. There is oil with calendula extract, and we will introduce it as a fatty component of the soap. Chamomile and chamomile can be added in the form of decoctions. For aroma, add a drop of tangerine and almond oil.
For a quarter kilogram of soap base take:
- half a teaspoon of carrot juice (for coloring);
- almond oil in the amount of 8 drops;
- a couple of drops of tangerine essential oil;
- a teaspoon of chamomile and string decoctions.
It is good to pour this soap into children's sand or baking molds. The baby will be satisfied with this soap.

But a child is unlikely to be seduced by tar soap; unless it surprises and makes you laugh with its blackness. But adults, especially those with skin problems, will be happy with such a gift. At home, it is quite possible to brew soap with the addition of tar and give it a decent aroma. To make the soap unusual and beautiful, it is better to choose a transparent base.
For 100 g of this base take:
- a third of a teaspoon of calendula extract in oil;
- one and a half teaspoons of birch tar;
- seven drops of peppermint essential oil.
Melt the base in the microwave, let it cool a little and start adding ingredients. The oil extract is introduced first, then, as it cools, tar is added, the essential oil is dripped in last so that it does not evaporate from the high heat. The resulting composition must be mixed thoroughly and filled into molds for the finished soap.
Honey

Does black soap scare you? Then you should use an old recipe that recommends taking milk and honey at the same time. You can mix all the ingredients together, or you can play with them - make soap from several layers, alternating transparent honey and matte milky layers.
The honey layer is made on a transparent base, where it is good to add, in addition to a teaspoon of honey, yellow food coloring - 3 drops, honey flavoring - up to 10 drops, a third of a teaspoon of grape seed oil. The calculation of the amount of ingredients is made for 50 grams of base.
The milk layer will require an opaque white base. We take twice as much, add a couple of teaspoons of sterilized or pasteurized milk, avocado oil in the amount of half a teaspoon. For beauty, it is advisable to introduce pearlescent pigment.
The first layer is made of honey, the top of which must be sprinkled with alcohol. You will have to use alcohol again immediately before pouring each layer. White milk is poured on top of the frozen honey layer. Then you can alternate layers and get striped soap with an unsurpassed honey aroma.
Double-layer soap-scrub (coffee-chocolate)

The idea of making soap that would also serve as a scrub is wonderfully realized in a two-layer version. One side of the cosmetic product is ordinary, the other has a scrubbing effect. The layers should be combined using the same technology with alcohol as when making honey-milk soap.
For the first layer, you will have to grind fresh coffee beans in a coffee grinder. The grinding must be medium so that the particles do not turn into dust, but also not be too heavy, otherwise when the soap hardens in the mold they will settle and remain only on the surface of the coffee side.
Ground coffee and dye are added to the molten base. If you want to depict coffee with milk, then the base can be matte, but you will have to tint it to a beige color. The transparent base is black coffee. Dye is added until it turns brown. You can add coffee flavoring if the smell from the beans does not seem pronounced. It is also good to accompany it with the aroma of cinnamon.
While the first layer hardens, you need to stir it if it becomes noticeable that the ground coffee is settling. The thicker the mixture becomes, the less mixing is necessary.
The second layer is chocolate. For this, you should take real chocolate, breaking off 5-6 squares per 100 grams of soap base from a large bar. The chocolate is melted into the heated base first. Next, base oil is added. It's good to take butter from any nut, as it goes well with chocolate. You can add up to 10 drops. The composition is poured onto the frozen first layer, previously sprayed with alcohol. The result is handmade soap, smooth on one side, scrubbing on the other, and also distinguished by a very appetizing smell.
Making soap from soap remnants
Do you feel sorry for throwing away beautiful colored remnants? They need to be put into action by grating and mixing. You don’t even need to use soap base, since it is present in every piece of ground soap. It is enough to fill the shavings with a small amount of glycerin, water and calendula oil tincture.
Now you can put the mixture to heat up. If the composition is cooked in a water bath, it can be stirred periodically. When you prepare a solution in a microwave oven, you will have to periodically stop it and stir the contents of the saucepan. When most of the remnants have been melted, it’s time to pour the composition into molds. You will get an interesting soap if some of the colored shavings or broken pieces remain unmelted.
How to make liquid soap with your own hands
You can also make liquid soap by hand if you prefer this particular hygiene product. If sodium hydroxide was used for solid soap, then the liquid cosmetic requires a different base made with potassium hydroxide. The process of saponification of oils will be approximately the same as when making soap base for hard grades.
If you are still afraid to get involved in preparing the base, then you can simply use soap remnants. You need to take them in pureed form in an amount of 50 grams and fill them with a liter of distilled water. Dissolve the soap in water, heating it. Remove the solution from the heat, let it cool, then add 4 tablespoons of glycerin and two tablespoons of alcohol. Next you need to add the selected essential oils and dyes.
In order for the hygiene product to be truly liquid and can be used in the traditional version, you will have to strain the mass through a sieve before pouring it into a bottle with a pump.
Handmade soap decor
The most enjoyable part of making homemade soap is decorating it. This is where you can unleash your creative energy. In the same mold you can get different soaps if you change its colors, combine matte and transparent layers, and add dried seeds, cuttings, leaves, and petals of aromatic plants. If you don’t have decorative molds, it doesn’t matter: you can make a rectangular bar from multi-colored layers, and then cut it into rainbow or striped soap.

Including glitter in the soap composition will turn your masterpiece into an elegant New Year's souvenir. It is better to buy small shiny particles in soap-making stores rather than try to make them yourself from foil. Buy mother-of-pearl there, which gives the finished product a real pearl shine.

In simple round molds you can create a semblance of a cut citrus fruit. The slices are made on a transparent basis. You can use small heart-shaped molds for them. You can also cut a round blank cast in a smaller diameter mold into triangles. The resulting triangles should be folded into a large shape so that there is free space between the “slices” and its edge. This is what should be filled with the white compound after the “slices” are sprinkled with alcohol. It is important that the triangles are not filled with white soap solution on top, so that it does not have to be cut off after hardening.

Handmade soap in itself is very decorative, so for a gift it is enough to put it in a box (preferably with a transparent lid), arranged with colored paper straws. Similarly, you can pack it in a basket.
Simple, minimalistic packaging - a piece of twine or hemp rope that is used to tie the soap into a bow. Under the rope you can insert a sprig of lavender or rosemary, three tubes of cinnamon, dry star anise, etc.


Video: how to make a drawing on soap
You can not only make soap from different layers and with interesting inclusions inside. It is quite possible to draw on homemade soap. There are several ways to transfer an image to a piece of cosmetic product:
- freehand drawing with migrating dyes;
- casting a three-dimensional pattern with an opaque layer and pouring a transparent base on top of it;
- drawing with colored soap using capillaries and sharpened skewers;
- introduction of a finished design printed on water-soluble paper into soap.
Soap with a picture
Soap with swirls
Soap with balls
Homemade soap making is becoming increasingly popular today. And this is understandable, because making soap with your own hands is an extremely interesting and profitable process that quickly becomes addictive and turns into a favorite hobby.
Perhaps everyone who has ever tried to make soap at home falls in love with this exciting activity. At first glance, it seems that making beautiful fragrant soap yourself is very difficult, but in fact everything is very simple. We invite you to get acquainted with this technology and make real homemade soap.
Soap at home - its benefits
There are plenty of reasons to make soap at home. After all, handmade soap is an environmentally friendly and natural product, unique in both form and content. Unlike store-bought soap filled with chemicals, homemade soap does not dry out the skin, but cares for it.
You can add natural additives to it that suit your skin type. This can be a variety of vegetable and essential oils, honey, herbal decoctions, citrus zest, natural coffee, oatmeal, algae, flowers, pieces of chocolate, loofah, etc. At the same time, you and your loved ones will always be confident in the effectiveness and naturalness of homemade soap, because it, like homemade food, is made with soul and only from high-quality products.
In addition, making soap is a real creative process. The form and content of homemade soap depends only on your imagination. It could be just cute colorful pieces of fragrant soap or a whole work of art. Let's take a closer look at the process of making soap at home.
How to make soap at home
Ingredients for homemade soap. So, to make soap you will need:
Soap base. You can purchase a special clear or white soap base at a specialty store, or use regular baby soap. White soap base is practically no different from baby soap, except that it has no smell. But a transparent base will allow you to make a very beautiful transparent soap. But for beginners it is better to practice on children's soap.
Base oil – almond, olive, peach, apricot, it can be anything. Essential oil. The choice of oil depends on your skin's needs. For example, tea tree is suitable for oily and problem skin, orange will saturate the skin with vitamins and get rid of cellulite, ylang-ylang will rejuvenate sensitive skin. Dyes. You can purchase special soap dyes or use food coloring. You can also add color to soap using natural products: cocoa, chocolate, fruit and vegetable juice.
Supplements In order to give your soap additional properties, you can add various additives to it: glycerin, cream, honey, herbal infusions, dried flowers. And if you want to make scrub soap, add ground coffee, oatmeal, ground nut shells, etc. Dishes for a water bath. Soap molds. You can use any molds: pastry molds, children's molds, special molds for soap, any plastic or ceramic containers. Alcohol to lubricate the surface of the mold. Warm milk, decoction or water to dilute the base.
How to make soap at home. So, now that everything is prepared, you can start making soap.
The first thing you need to do is cut the soap base into small pieces or grate the baby soap, this will help them melt faster. Now melt the soap base in a water bath, stirring it occasionally. Add base oil to the soap at the rate of 3 teaspoons per 100 grams of base. While the base is melting, it is necessary to occasionally add a little milk or cream to obtain a creamy mass. Instead of milk, you can add a drop of water or a decoction of herbs, but water can cause the soap to separate. It’s best to replace water and milk with sugar, this will allow the base to melt faster and better.
When the soap base is completely melted, remove it from the heat and add various ingredients: 5 drops of essential oil, a teaspoon of glycerin, dyes, flavors, coffee and any other ingredients you wish. Now you need to pour the soap into a mold and spray the surface of the soap with alcohol from a spray bottle, this will remove bubbles on the surface. We leave the soap in the molds until it hardens completely; you can put it in the refrigerator or a cool place. After about 2-3 days, the soap will be completely dry and ready for use. We take it out of the molds and show off the result!
Homemade baby soap
Soap making is a very interesting and very exciting process, and a whole book could be written about the benefits of handmade soap.
I made this first soap about two years ago.
Today I can more or less make any soap from a base, I’m learning how to make soap from scratch (but that’s a different story).
For everyone who is interested in this topic, I want to tell you how easy and simple it is to make homemade soap from baby soap.
To be honest, there are no particular difficulties in making soap. Here it is important to learn a few basic rules of technology and use your imagination. And over time, having gained experience, you can become an excellent soap maker.
And now a simple master class for everyone who has decided to try making their first soap from the simplest ingredients.
So, we will make moisturizing milk soap from baby soap.
Compound
You will need 100.0 of the simplest baby soap.
Be sure to pay attention to its composition, it should be without additives, flavorings, or adding cream, otherwise unpleasant moments will arise when making soap, but we don’t need them.
100.0 milk
1 tbsp olive oil
a couple drops of your favorite essential oil (I used cinnamon and vanilla), you can do without it.
1 tbsp honey or sugar
Dishes
First, you will need to build a water bath; to do this, pour water into a larger saucepan and immerse a smaller saucepan in it.
Instead of a small saucepan, I had a heat-resistant colander in which I placed a plastic bowl for melting the soap.
Stick or spoon for stirring.
Metal grater.
And a soap mold, greased with oil.
You can use a silicone muffin mold or a plastic soap jar as a mold. The main thing is that you can get your soap later.
My real soap mold was replaced by a jar of cotton swabs.
We are just starting out, we are trying to make soap, so we don’t have any accessories, we make do with improvised means).
So let's get started.
Preparation
First, let's grate our soap on a fine grater, pour hot milk into it and leave for a couple of hours.
Ideally, overnight in the refrigerator.
 Then we put our soap shavings in a water bath heated to 50 degrees. Add honey or sugar (these are melting agents). And stirring periodically, without allowing it to boil, dissolve it until smooth (without lumps). Remove from heat. Add 1 tbsp olive oil and 3 drops of essential oil to the melted base. Stir and pour the mixture into the mold.
Cool it for 15 minutes and then put it in the refrigerator.
When the soap hardens, remove it from the mold. We try to do this carefully by pressing on the bottom of the form. If it is difficult to remove, you can lower the mold into boiling water for a couple of seconds (but make sure that the water does not get on the soap itself), and then resume trying to get the soap out.
Dry the finished soap on paper for 24 hours. This way it will get rid of excess moisture, harden and become suitable for use.
Now pack it away or keep it for personal use. That's it, your first homemade handmade soap is ready!
Approximately the same technology is used to prepare any other soap from baby soap. Just use your imagination, add other oils: coconut oil, apricot oil, rosehip oil, macadamia oil, etc. (in the same proportions), natural dyes and flavors, and you will have your own homemade and very healthy soap.


The advantages of handmade soap include not only the purity of the product, but also uniqueness and individuality. You can independently select and add to the bar those nutritional components that your specific skin type needs. If you give a gift to a teenager, you need to take into account the increased likelihood of acne. Men need to soothe their skin after shaving. And confident women should be given skin care, youth and freshness along with soap.
Ingredients required
To make your own soap, you need to purchase the necessary components:
- Soap base (special transparent or regular baby soap).
- Any basic vegetable oil (olive, apricot, sunflower, almond or others).


- Essential oil depending on the characteristics of your skin type (ylang-ylang is suitable for sensitive skin, tea tree, aloe for problematic skin, orange, grapefruit for cellulite).
- Dishes for dissolving soap and molds for hardening.
- Alcohol for bonding layers and lubricating the surface of the mold.
After preparing all the components, you need to start making soap.


Let's start doing magic
First, the soap base is grated so that it melts faster in a microwave oven or in a water bath. Base oil is added at the rate of 3 teaspoons per 100 grams of base.
Milk, cream or water is added while the base melts to obtain a creamy mass. Excess water causes the soap to separate, so it is best to add sugar to help the base melt faster.


The soap is poured into a mold and sprinkled with alcohol so that there are no air bubbles on the surface. Leave in the refrigerator or other cool place for 2-3 days until completely dry. All that remains is to remove it from the mold and give it to your loved one.
Anyone can make this soap themselves at home.


Advice!To prevent the finished soap from deforming while it is delivered to the recipient, it must be wrapped on top with cling film.
Master class with step-by-step photos on making handmade soap


The only thing better than flowers is a bouquet of handmade soap
If you don’t know what original gift to give to a friend, mother, mother-in-law, or lover, always remember that a gift made with your own hands is most valued. Considering women’s love for flowers, these two points can easily be combined and get the perfect bouquet - made from handmade soap.


If desired, you can make a bouquet of any number of flowers. Considering that roses are considered universal, you need to learn how to make them first. Knowing the basics, you can easily make any other flower. To make soap roses you will need:
- 200 grams of baby soap;
- 1 tablespoon of edible gelatin;
- 7–8 tablespoons of water;
- It is advisable to use flavorings and food coloring to resemble a rose;
- smooth knife;
- paring knife.
Gelatin is poured with cold water and left to swell for half an hour - 50 minutes. At this time, the baby soap is grated and, stirring constantly, melted in a microwave oven or in a water bath until smooth. At this stage, flavors and cosmetic oils are added.


Add already swollen gelatin to the mixture and pour the soap into various forms (hair spray caps, baking dishes, empty cases for watercolors or cosmetics are suitable). It is better if the containers are silicone, since it is impossible to get soap in its original form from glass or metal. Place the resulting masses in the refrigerator for 10-15 minutes until hardened.
The soap cylinders will be slightly damp and still warm. Use a paring knife to remove thin round layers of soap. These are already petals for the future rose. They can be of different shapes and sizes. That's the beauty of it. To create the core, you need to twist one soap petal slightly diagonally. The next few petals need to be wrapped around the core.


To make the rose look like it has blossomed, you need to turn the edges of the next petals slightly outward. Continue until you get a flower of the required size. If the cone turns out to be too long, you can cut it off with a knife.
The leaves for the bouquet are made from soap in the same way as flowers, but in a different color. The veins are drawn with a toothpick or needle.
A rose with a leaf can be made into a separate flower to make a bouquet. Or you can use it to decorate a bar of soap. It all depends on the desire of the master.
Advice! Soap flowers are a great gift because you can not only wash with them, but also put them in the bathroom for decoration. Thanks to gelatin, the humidity will make the roses smell fragrant and lift the mood of the owner.
How to make a drawing on soap
Handmade soap with a pattern is one of the most original gifts, which seems very difficult to make at home. If you choose a drawing that is close in spirit to the person to whom the product will be given, or even his photo, you will give not just hand-made soap, but a work of art in which your soul has been invested.


First of all, you need to select a thematic picture and print it on special water-soluble paper. It will be better if you use a color laser printer, since it accurately conveys all the colors that are not distorted during further manipulations. Before starting work, the drawing must be thoroughly dried and sprayed with hairspray.
Soap base or baby soap must be melted in a microwave oven or in a water bath so that there are no air bubbles. Dyes and flavors are not added to this layer, as they reduce transparency, which is necessary for image clarity.
The resulting melted soap is poured into a pre-selected mold with a layer 2 mm thick and a picture is placed on top, pattern down. To avoid air cavities, you need to immediately decide on the location of the printout. Sprinkle it evenly with alcohol on top and pour a 1.5 mm layer of soap on top. This is done so that the white layer does not spoil the picture if it leaks under it. Alcohol treatment is necessary to eliminate bubbles on the surface.


The next layer is white. It shows the best picture. Therefore, a little soap according to the mold is melted so that there is enough and poured on top of the already solidified transparent layer treated with alcohol. After complete hardening, the next thick layer can be decorated in an original way using soap shavings, glitter, coffee beans, dried flowers or other decorative elements. If shavings are selected, they must first be frozen so that they do not melt when they are poured into the next hot layer.
Advice!You can add a different number of multi-colored layers, depending on your imagination, but the main thing is not to overdo it, as the layers may not stick together.
Step-by-step master class on making multi-colored soap


How to make handmade soap with inscriptions: cute, fast, cheap
To reach the heart of a loved one or simply cheer up a friend, you can give an original handmade soap with an inscription that is relevant and meaningful to you or the person. Experts identify two main ways to decorate a product.
To implement the first method, you need to pour a small amount of pre-melted baby soap onto cling film and let it harden a little. On this basis, cut out the letters needed for the phrase with a sharp object, preferably a needle or toothpick. After complete hardening, the base easily comes off the film. The main thing to remember is that you need to write the letters in a mirror image, since the front of the soap will be at the bottom of the mold.
 Attach the stencil to the finished bar of soap, take a sharp object, such as a wooden skewer, and trace the letters
 The second method involves having a ballpoint pen and plain paper. It looks a little cheap if you don't write it carefully. You need to write the phrase in bold and fill it with a thin layer of soap base. After hardening, the inscription easily remains on the soap, and the paper is torn off with a sharp movement. After the manipulations have been carried out, the printed phrase is placed in a soap mold and poured a second time with the melted base. To ensure that the layers stick together, do not forget about treating with alcohol.
Advice! To make the gift touching and individual, it is better to choose a meaningful phrase for the person. This will indicate your attention and understanding.
Useful properties of laundry soap in handmade soap
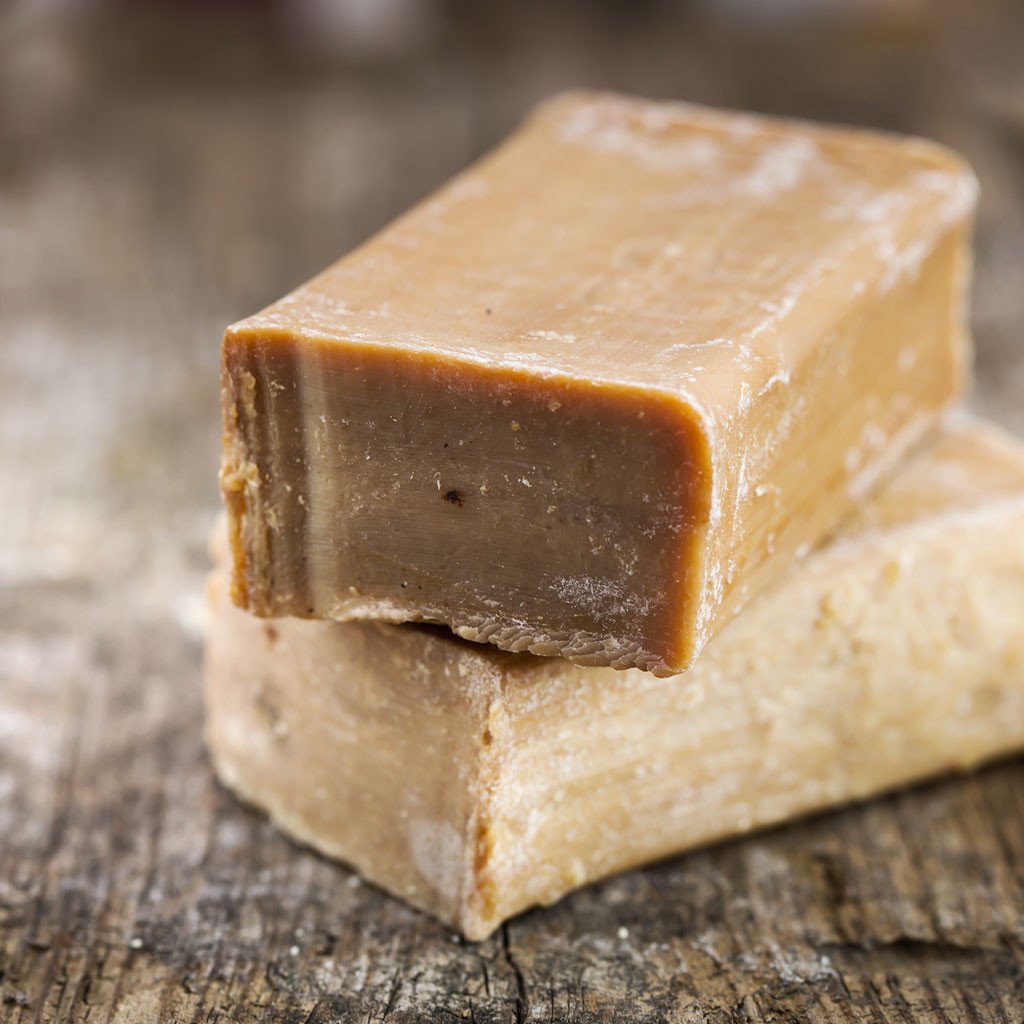
Laundry soap has lost its popularity in the 21st century due to its unattractive appearance, smell, and shape. However, everyone over 30 knows about the beneficial properties of the brown substance:
- washable;
- kills bacteria;
- improves hair condition;
- considered a folk remedy for the treatment of acne and acne;
- treats inflammatory processes and gynecological diseases;
- disinfects the wound from infection;
- eliminates fungus.
There are three known methods of soap making based on laundry soap.
One of them is a three-layer kitchen one - it eliminates any contamination, including greasy stains and food residues on the plate. The basic rule of use is to wear gloves, as the product dries out the skin.
To prepare kitchen soap, you need to take 100 grams of laundry soap, grate it, add 180–200 ml of water and melt it in a microwave oven or in a water bath. When the resulting liquid resembles honey, beat it with a mixer at low speed. Collect the foam in a separate container. The mass, which has already been melted, is divided into three parts. To the first add a tablespoon of mustard powder, to the second - 2 tablespoons of coffee grounds, which will get rid of the unpleasant odor, and a spoon of castor oil.
To glue two pieces of soap, you need to sprinkle the first layer with alcohol and pour the second one on top of it. Alcohol also removes air bubbles.
The third layer with soda to enhance the cleansing effect. It is mixed with the foam that remains after the first whipping of laundry soap, and a tablespoon of soda. When laying this layer on top of the previous one, do not forget to moisten it with alcohol.
Soap in the shape of hearts - a cute gift for loved ones Handmade soap should be left to dry for at least a week. There will be no characteristic odor, the cleansing properties will increase several times.
The second method of making handmade soap will appeal to girls who take care of their skin condition, as this product nourishes and moisturizes it. You need to dissolve 150–200 grams of laundry soap and thoroughly mix with the ingredients one tablespoon each of honey, sunflower, sea buckthorn and castor oil, 100 ml of boiling water and one dessert spoon of apple cider vinegar. After obtaining a homogeneous mass, add 1 teaspoon of anti-cellulite oil, chlorophyllipt, vitamin E and 0.5 teaspoon of glycerin or baby cream.
For a pleasant smell, add 10 drops of lavender essential oil or men's eau de toilette to the soap. Once cooled, simply place in the freezer for just one hour. Then you can use it.
The third recipe contains milk, so the soap is excellent for delicate and sensitive skin.
80 ml of milk is mixed with 100 grams of laundry soap, previously grated, and the mixture is melted in a microwave oven or in a water bath, stirring occasionally. To speed up the process, add 1 tablespoon of honey. When the soap dissolves, beat it with a mixer until light and cool.
To the mass, which has already cooled, you need to add a tablespoon of apple cider vinegar, olive oil, castor oil and vodka. Almond essential oil helps to completely remove the aroma of laundry soap, but it is contraindicated for pregnant women and children under 6 years old, so it is better to use chocolate, cocoa, ginger, cinnamon and other aromatic additives.
Advice! To make the soap foam well, you need to add coconut oil or other vegetable fats to the composition.


