The weather is raging outside the window, and in your house firewood crackles in the fireplace, small flames blaze, the table is set and soon the whole family will gather for dinner in a cozy living room.
Why do you need a fireplace?
Thanks to the fireplace, a peaceful and comfortable atmosphere reigns in the room, and the flame in the fireplace attracts and fascinates the views of others. Fireplaces are always fashionable, they have been and will be in demand and popular.

Even a small hand-made fireplace will decently increase the value of any home.

In appearance, it seems that this is a completely simple structure and is within the power of everyone, which does not require certain skills and knowledge.
And we can agree with this, but subject to a clear and phased implementation of the technology for the production of work on installing a fireplace with your own hands, using a photo and some recommendations.

A fireplace can be built with your own hands if necessary:
- solving the issue of heating a country house;
- creating a certain interior style;
- reducing the cost of heating the home and the rejection of individual water heating using a boiler.

With a serious and firm intention to make your own fireplace, you will need an estimate for consumables. When compiling it, take everything into account to the maximum, you should not save, so as not to get an unpleasant surprise in the future.

And how to make a fireplace with your own hands is described in detail in the step-by-step instructions.

Selecting the required material
At the beginning, it is worth determining what type of fireplace you would prefer to see in your country house: a regular fireplace, a fireplace stove or a barbecue fireplace. All these structures are quite realistic to bring to life with your own hands.
But first, you need to learn a little about bricklaying an outdoor fireplace and get some skills in working with a bunch of corners and leveling rows.

If you are a person who is prepared in this matter, everything will be easier for you.

Location of the fireplace
Currently, on the Internet you can find various options for installing a fireplace with a variety of schemes and step-by-step video recommendations for laying a brick fireplace with your own hands.

It is more difficult to choose a place for laying the chosen type of fireplace with suitable dimensions.
Choose the simplest option that suits you:
- by heating area and dimensions of the combustion chamber;
- according to the dimension of the chimney pipe, its shape, supply ventilation;
- at the location in the room.

Remember: if you are not an “ace” in self-calculation of the main structural parameters of the fireplace, you should not try to make a reduced or enlarged copy by proportionality. Your efforts will most likely be in vain.

The World Wide Web will help you purchase the desired finished project or independently understand the methodology for self-constructing a fireplace.

This will require some effort, time and experience in making calculations, if you do not doubt your abilities, then you are guaranteed to save money, but you can make mistakes when planning.
Note!

So, the best option would be to order a project from specialists in accordance with the area of \u200b\u200bthe heated room and the location, but you can do the work on the construction of the fireplace yourself or also hire qualified craftsmen, but their work will be expensive, at least 30 thousand rubles.

Varieties of fireplaces
If you are not a fan of all sorts of troubles and you don’t need a decorative look for a fireplace, but you only need a practical aspect, then its simplest option is for you. The heat transfer will be no worse, it will be much cheaper in price, and its simple design can be done by hand.

Such a project can be easily found on the Internet or purchased from design organizations at a very reasonable price.

An ordinary fireplace, straight or corner, also has its advantages:
- ideal thermal properties, low weight and non-contact with the inner wall, which contributes to the rapid heating of the room;
- a straight chimney creates good draft for the process of burning firewood and briquettes, even damp ones;
- simple design,
- relatively low price for materials and project.
This version of a conventional fireplace is considered the best for a summer cottage, made by hand.

If you figured out the construction of a simple fireplace on your own, you can try to figure out the design of an English fireplace (3x5 bricks). In this design, there is a certain scaffolding, which is laid with an edge of bricks.
Note!


The English version will also require accurate calculation and proper laying of bricks in rows. Check the quality of the brick and cement mortar in advance, since the strength of the bonding seam is considered an important point.

Choice of clay and brick
To form the central frame of the fireplace, you must:
- ceramic brick M 175-200 in the amount of 300 pieces;
- refractory fireclay ShB No 8 - 150 pcs.;
- a solution of sand and clay - 100l;
- fireclay solution - 40-50 l.
Brick, first of all, must be of a certain shape and strength. For chimney masonry, it is best to choose a red solid brick without cracks and chips, even and smooth to the touch.


Yes, indeed, without fireclay, the furnace warms up much faster, but the occurrence of cracks also increases. Therefore, by using refractory, the furnace will become more reliable.

Note!

bonding solution
It is quite difficult to make a high-quality binding solution with your own hands. To do this, prepare a mixture of sand and mashed clay in a ratio of 1: 2. There is no exact recipe for preparing the solution, there are only some incomprehensible tips.

Sand should be washed thoroughly. Soak the clay and drain the water. A layer of slightly wet sand is poured on top of the clay layer. Mix with chopping movements from top to bottom until a homogeneous mixture.
We check the quality of the resulting solution ourselves. We take the solution in our hands and form a cake. We slap it on a steel sheet and send it to dry at a temperature of 50-60 degrees until dry.

After that, we check for strength:
- cracks are visible, so you need to add sand;
- cracks are not visible, but the cake crumbles, so you need to add clay;
- the cake is strong and adhered to the metal, which means the proportions are correct.

To bind the refractory, finely ground fireclay should be added to the mixture.

Fireplace wall construction
At the very beginning, you need to do waterproofing. Then, a rubble foundation or a concrete slab is arranged on top of it, checking the accuracy of the installation with a building level.
Bricklaying of the 1st row is carried out without mortar, but taking into account the gaps in the mortar. Then, using a vertical plumb line in the center of the chimney, lay out a row and mark the second row of bricks.

Before further laying bricks on a binder mortar, they are immersed in water for 20-30 minutes. The thickness of the seam should be about 8 mm, for a refractory about 5 mm. To choose the right size of brick, if necessary, you can chip off the excess part with a hammer or cut it off with a grinder.

On the masonry of the 3rd or 4th row, a cast-iron grate is arranged. The zones of the location of the valves on the chimney and the doors in the niche with ash are made with asbestos putty in the form of a cord, or asbestos is added to the refractory itself.

In order for the fireplace pipe to smoothly pass to the chimney, you need to use a view, although one way or another, you still need a fire-resistant heat insulator in the exit area through the roof.
Tip: when laying bricks, do not rush, it is better to double-check the evenness and quality of the masonry once again. In general, it should take you 5-6 days to lay bricks.

In cases where the room does not allow the installation of a real fireplace, you can make a so-called decorative false fireplace, that is, a believable imitation of a real fireplace, which will also add coziness and comfort to the interior. But this will be another article.

DIY fireplace photo


With all the advantages of water and radiator heating, many private homes are trying to keep or build traditional wood-burning stoves and fireplaces. The incomparable comfort and coziness of a fireplace rest brings back the idea of heating with wood to the premises of private houses, sometimes as an element of the interior, but more often as a full-fledged heating device. Every second summer resident or owner of a country house solves the problem of how to build a fireplace, guided by his ideas, which are far from the most successful.
How to equip a fireplace
Despite the apparent complexity, you can build a real fireplace in the cottage yourself, you just need accuracy and precision in work. Materials can be bought at a building supermarket, and projects of all kinds of fireplace structures can be found in specialized publications. In order for the fireplace scheme to be successful, before you build it, try to decide on a few of the most important conditions:
- The mass of brickwork must correspond to the speed and duration of heating the room. Massive buildings warm up for a very long time, small ones cool down quickly, so the dimensions of the fireplace and the heated room have to be carefully verified by existing standards;
- Proper location of the fireplace in the room. For a building of several rooms, it would be optimal to build a building on a partition; for a room in which there is only one room, the place for installing a fireplace is determined on the wall adjacent to the front door;
- The method of air intake into the combustion chamber.
The selection of air necessary for burning fuel perfectly ventilates the room in the summer, but in winter the fireplace can seriously cool the room, so experts advise not to install fireplaces in a straight line with the window opening.
Advice! To eliminate problems with the air supply, stove-makers are advised to make an external air supply through a separate air intake pipe that takes the air flow from the basement or from the basement of the walls of the building.

Such a fireplace design allows you to get rid of drafts in the room, but in this case you will need to disassemble the floor in the room and part of the wall in order to build an air intake from an asbestos-cement pipe. In addition, it is necessary to correctly adjust the pressure drop across the combustion chamber so that gusts of wind in the air inlet do not throw some of the burning coals into the room.
There are many tips on where and how to build a fireplace. There is even the opinion of homegrown experts who do not believe in the possibility of building a fireplace for efficient space heating, and recommend installing truncated versions of fireplace inserts on terraces, as in the video:
Is it possible to heat the room with a fireplace
At first glance, the design of the fireplace is inferior in efficiency to a hot water boiler or a Russian stove. In fact, this is a small brick firebox with a wide fireplace portal, a reflective mirror and a disproportionately large chimney.
This design of the combustion chamber of the fireplace allows you to light a fire in a matter of minutes even in wet, foggy weather, when a cold chimney does not give normal draft. They prefer to build a fireplace in a country house or in a country house and use it as a means of quickly heating a room. As the fireplace warms up, a red-hot mirror and heated brick walls of the fireplace insert are included in the process of heating the room.
According to the principle of operation, it is closer to the device of a potbelly stove than to a Russian stove. In this way, you can heat a small room with good thermal insulation of the walls. If we are talking about a summer house or a country house with a couple of rooms, then it is better to build a fireplace stove - a close relative of the fireplace, but with the best features of both designs.
Ideally, a brick fireplace is best built in the center of the room, or built into a partition for a two-room building:
- No drafts in the room;
- Good heat removal from the brick surface;
- No heat loss to the outer wall;
- Simple arrangement of the foundation of the furnace.
Advice! If there are remains of an old stove in the room, it is better to build a fireplace on its solid foundation. This will simplify the work and reduce costs.
When choosing a place in the room where you want to build a fireplace stove or fireplace, first of all pay attention to the location of windows and ceiling beams. Often, the layout of the beams and truss frame does not allow you to build a chimney in the chosen place, so you have to move the installation site of the fireplace.
A full-sized fireplace stove can be built in a corner with a slight setback from the walls. In this case, the design of the chimney can be simplified, the pipe can be made lower and even taken out to the outer surface of the wall.
A simple and convenient option for a fireplace for giving and at home
The construction of the fireplace begins with the measurement of the room, the choice of location and the calculation of the parameters of the structural elements of the future fireplace masonry. First, we measure the heated area of \u200b\u200bthe room and, by quadrature, determine the dimensions of the fireplace from the table.
If you build a classic version indoors without glazing, with a smoke tooth and a standard grate size, the depth of the combustion chamber must be chosen no more than 2/3 of its height. The shape and proportions of the combustion chamber depend on the structure of the chimney, the parameters of the grate and the presence of a heat-resistant glass door that closes the fireplace opening. In this case, the combustion chamber can be built flatter, with a reduced furnace depth. Such designs are suitable for apartments and small rooms where it is required to build compact and easy-to-maintain fireplaces.
For the first experience, it is better to build a simple model of a fireplace with a rectangular combustion chamber, a body width of four and a depth of two and a half single bricks, shown in the video:
The dimensions of the combustion chamber are 45x45 cm, with a depth of 28 cm. The heat output of the fireplace is sufficient to heat two rooms of 15 m 2 each.
Fireplaces with high thermal power are preferred to be built using a cast-iron or fireclay cassette - a combustion chamber made in the form of an all-metal box with a cast-iron rear wall and a glass portal door.

In the above design, there is no cassette, but the glass door of the combustion chamber is used. Air intake is carried out through the bottom opening of the ash pan. The ash is collected in a metal box-shaped tray installed in the ash pan niche. By adjusting the position of the box in the ash pan, you can additionally adjust the burning rate and achieve good efficiency of the fireplace. In such designs, hot gases do not heat up the chimney system and do not produce a large amount of soot even when softwood is used as firewood.
We lay out the base and the pallet of the combustion chamber
The fireplace structure weighs several hundred kilograms, so it is necessary to build a base or foundation for the fireplace. The first step is to mark and cut out the floor boards. To build a foundation, you will need to dig a rectangular pit, 120x60 cm in size and 100 cm deep. A layer of sand and gravel, a waterproofing plastic film and a reinforcing mesh are laid at the bottom of the pit. The walls of the pit will need to be protected with roll material of the isoplast type. A reinforced concrete slab with a thickness of at least 10 cm is cast into the base of the foundation, the rest of the volume is filled with rubble stone on cement mortar.
The upper plane of the foundation is reinforced with fiberglass mesh and carefully leveled along the horizon. You can start laying bricks in two days.
The waterproofing layer is laid first from a double-folded fiberglass roofing material. The first two rows are laid out from high-quality bricks on a cement-sand mixture. For the rest of the masonry, lightweight bricks are used.
On the third row in the central part, it is necessary to build the entrance of the combustion chamber. The width of the ashpit is one brick. The cavity of the combustion chamber is laid out inside the fireplace up to the sixth row.

To build an equilibrium brickwork, three main parameters must be controlled:
- The thickness of horizontal and vertical seams, control is carried out using a steel bar with a diameter of 8mm;
- Horizontal level of the stacked row;
- The verticality of the side surfaces of the fireplace.
An eight-millimeter steel rod is also used to form a layer of the desired thickness on a brick bed.
Advice! If during the laying process the thickness of the seam turned out to be less than 8 mm, the width of the gap can be increased using a bar neatly laid over the joint. A few light strokes with the trowel handle are enough to adjust the size of the seam.

Arrangement of the combustion chamber and the system for removing combustion products
Starting from the sixth row, it is necessary to build a combustion chamber from refractory fireclay material. The easiest way to build a fireplace is using ready-made masonry clay-chamotte mixture as a mortar. The first to lay out two longitudinal blocks of the base of the rear wall.

Next, two transverse fireclay are laid with side niches cut out under the grate, and the last two front fireclay bricks are installed. This makes it easier to build a fireplace, and the integrity of the base of the combustion chamber is guaranteed even when coal or peat briquettes are used as fuel.
Between the fireclay rows and the outer lining of the fireplace around the perimeter, basalt cardboard must be installed to compensate for the expansion of the refractory.
A half of a standard eight-strand grate for a brick oven is used as a grate. The grate is installed in grooves with a gap of at least 5 mm, without grouting.
The side walls of the combustion chamber are laid out on the built chamotte pallet, the masonry is made in a quarter of a brick on a clay-chamotte mixture. The front ends of the masonry are sealed with basalt cardboard. A thermal gap of 7 cm wide is left between the masonry of the fireplace lining and the combustion chamber.

On the twelfth row, a smoke or soot tooth is laid out in the combustion chamber. If you build a fireplace without a smoke tooth, the draft will be better, but soot emissions into the room will periodically occur.

A basalt strip is laid over the lined row of the fireplace tooth, then the back wall of the combustion chamber and the mantelpiece must be built with red brick.
Chimney part of the fireplace structure
After hanging the door and arranging the combustion chamber, you will need to build a smoke box or a fireplace hood. This is the transition section from the combustion chamber to the chimney. Each new row is laid out with an offset of 6-5 cm.

After narrowing the cap to the size of the chimney, three rows of pipes are laid out, and then you need to build a valve or a fireplace damper. A niche is cut out on the inner surface of the masonry with a grinder, slightly wider than the size of the valve. The base under the gate is laid out with basalt cardboard.

The chimney must be built from lightweight fire-resistant bricks. In the area of intersection with the ceiling of the room and the roofing pie, two metal clips are installed, filled with basalt felt. On the roof, the outlet of the chimney pipe is made in the form of a thick-walled steel pipe installed on a brick base.
Conclusion
After 5-6 days from the end of the masonry work, additional drying of the inner walls of the fireplace is carried out. To do this, part of the chips, shavings and paper packaging are burned in a combustion chamber with a fully open ash pan and gate. The flame allows you to dry the wall and show the customer how efficiently and correctly it was possible to build the combustion chamber and the chimney of the fireplace.
The fireplace is a unique element of the interior. In addition to the practical function, it also carries a decorative one. A room with a fireplace acquires a homely and cozy, but at the same time noble look. It is pleasant to spend a family evening, a friendly meeting or a romantic date near it. And how well it fits into the New Year's decoration of the house, it's not even worth talking about. But in modern buildings, a fireplace is a rarity.
If it was not laid during the design of the house (and the decorative one during the design of the interior design), it is not so difficult to fix it - we stock up on materials and make a fireplace with our own hands.

What it is?
A classic fireplace with a space heating function is a heating device with an open firebox and a ventilation system to remove smoke from the room. In fact, this is a modification of the first English fireplaces. In Tudor times, they literally looked like a fire in the middle of the room. The fire was placed on a small stone fire pit, and the smoke escaped through a thatched roof and empty window openings.
With the development of construction, the fireplace also changed, but its design did not become much more complicated. The "indoor fire" was moved from the center of the room to the wall, equipped with an open firebox, a smoke hood and a pipe. A little later, the back wall became inclined, and the side walls began to be made of reflective materials.
This increased the efficiency of space heating at times.


In this form, it functioned for many years, until the craving for aesthetics turned a simple stone firebox into pompous decorations made of brick, ceramics and metal.
Along with external changes, the design also varied.

A fireplace with live fire consists of the following elements:
- Foundation. Laid below the floor.
- Shantsy. This is a podium or stand for the firebox. In it, blowers are installed for supplying oxygen. And oxygen, as you know, is necessary for the combustion reaction. Also, the trenches perform a protective function. They are carried forward beyond the perimeter of the firebox and prevent the floor from igniting sparks or coal.
- Ash pan. Designed for ashes and ashes.
- Under. A firebox is placed above the hearth and fuel is burned. It must be fireproof.
- Firebox or firebox. Actually, the space in which the fuel burns. It can be equipped with a grate - a grate on which firewood is placed. Such a device allows oxygen to enter from below and improve combustion.


- Cast iron door. Present in the design of closed fireboxes. Rarely used in modern interiors, but has its advantages.
- Smoke circulation system. Heat rises in it and communicates with the room through the walls of the masonry.
- Chimneys. A pipe system that removes gaseous substances, soot, odor and smoke. They include various elements to trap sparks and give the right direction to heat flows.
- Portal or mouth. This structural element closes the outer part of the firebox and has an aesthetic function. May have a visor and a shelf on top. Should not exceed 3% of the area of the room.
- decorative elements.
- accessories: doors, barbecue grills, grate, blower, sometimes oven.


Peculiarities
After structural and external changes, the fireplace has not lost its functions. It is still used for space heating, but as a source of heat from centralized heating and heaters, it differs in some features.
First of all, the decorative function of the fireplace is inseparable from its practical application. In a modern interior, the most primitive firebox design is no longer enough. It should have a zest, something that will contribute to its integration into the design of the room and draw the eye to it.


The second distinguishing feature is the distribution area of fireplaces. These are regions with a humid climate where severe frosts do not rage. The firebox of a fireplace stove is large, it absorbs significant volumes of air during the combustion of fuel. This promotes efficient air exchange. Cold and humid air quickly warms up, the room dries out.
In regions with severe frosts, but dry air, a room with a fireplace will be cool and with a too dry microclimate.

It is better to limit yourself to an electric option, a biofireplace or a fireplace with a closed firebox. By opening and closing the door, you can adjust the indoor climate.
In third place is the efficiency of the heating system. It depends on the fuel used. The source of heating in the fireplace stove is radiant heat. At the same time, firewood gives off 25-30% of heat, various types of coal and peat - from 50 to 60%.


Advantages and disadvantages
The positives are strong enough to put in the effort and make the fireplace yourself.
Advantages of traditional fireplaces with open and closed firebox:
- The system quickly warms up the air. An open fire gives off heat directly to the room, this is an indisputable plus for country houses of irregular residence and cottages with a cold lower floor. Actual use in the country.
- The fireplace is indispensable in rooms with high humidity. These can be the first floors of country brick houses, cottages in regions with constant rainfall and nebula. Due to the rapid air circulation, unnecessary moisture evaporates, the room becomes not only warm, but also dry.
- Can serve a culinary function. Fireplaces are often equipped with barbecue or skewers holders, grills, and sometimes ovens.
- Gives the room a special atmosphere of comfort, symbolizes the hearth.


- plays the role of the unusual element design.
- decorative fireplace easy to fold by yourself.
- Not dependent on electricity. Interruptions in electricity do not affect it in any way, unlike dependent heating systems.
- Can be used at any time of the year. For example, in cool summer or early autumn, when it is too early to use another type of heating.
- With closed furnace it is possible to adjust the burning rate. Its efficiency is higher than that of an open one.
- Fireplace with closed hearth, gas and water circuit can heat from 1 room to the entire floor. A corner fireplace can work for two rooms. But their device requires the participation of professionals and will cost a significant amount. Such systems should be laid immediately in the process of building a house. They are not available for apartments.


Not to mention the significant disadvantages:
- Projects of modern and typical houses do not imply the presence of a fireplace. To install it, you will need a diagram of the house, a detailed drawing, and professional participation. Permission to build an open or closed solid fuel fireplace is a separate complex issue.
- Laying a working fireplace is a troublesome, dusty and lengthy process. Ideally, it requires qualified help from a stove-maker.
- The fireplace cannot become the main source of heat in the house, since the structure does not have the ability to accumulate this heat. The fireplace heats up while it's working. As soon as the fuel burns out, it begins to cool. If we are not talking about a cottage or a summer house, but about an apartment in an apartment building, a traditional fireplace with live fire is completely impossible to organize. Here its function is purely aesthetic.


- Low efficiency with high fuel consumption. This increases the financial cost of maintaining the fireplace.
- The limited range of a traditional open hearth fireplace. The fireplace in the center of the room and against the wall only heats one room. The heat is distributed unevenly.
- Requires maintenance (chimney cleaning).
- The high cost of bookmarking and arrangement.


It is far from possible to equip a traditional solid fuel fireplace stove in all rooms, so alternative options have appeared. These are gas and electric fireplaces. They also have their pros and cons.
Gas fireplace according to the principle of operation and appearance is closer to the traditional one.

Among its advantages are features such as high efficiency and speed of operation, the ability to adjust the speed and intensity of combustion, safety, silent operation and high speed of heating the room. In addition, there is no need to procure and store fuel, and gas is cheaper than firewood at cost. They can heat an entire floor.
The disadvantages of such a fireplace are obvious: complicated installation of the gas system, lack of charm and aesthetics of a real fire, large overall dimensions and weight.


New generation fireplaces are powered by electricity.
They have all the advantages of modern technologies:
- installation does not require the involvement of specialists, is carried out by hand;
- simple and clear mechanical and remote control;
- adjustable level of heat intensity;


- it can be suspended, angular, non-trivial shape and configuration;
- there is no need to lay a chimney, make a foundation and think about fire safety;
- works silently, without smoke and soot;
- has a small weight;
- flame looks realistic.


There are relatively few disadvantages: the lack of coziness and crackling of firewood characteristic of a traditional fireplace, high energy costs, the ability to heat only one room, and dependence on electricity.

Kinds
All modern fireplaces are divided into several types according to four criteria. Conditional criteria: type of fuel, type of construction, type of installation, purpose.
There is another classification - according to the place of origin. It is customary to distinguish English, French, Estonian, Finnish, German, Russian fireplaces in it. Their internal structure has slight differences, so this classification is important only for the external appearance of the fireplace. Remarkably, the Russian fireplace has a relatively small size and is called a small fireplace.


According to the type of fuel, fireplaces are:
- Solid fuel(heat is obtained in the process of burning firewood, peat or coal). These include traditional open hearth fireplaces, fireplace stoves and closed hearth devices. The first variety has the lowest efficiency - up to 25%, the rest - up to 80%.
- Fireplace with air heating. This is a kind of solid fuel devices that operate on a closed firebox. Its design includes an airflow convection system to increase efficiency and efficiency.
- Liquid fuel. Such types are called ecofireplace or biofireplace. Sometimes the name "alcohol" is found. This is due to the fact that they use liquid combustible materials of natural origin, such as bioethanol or ethyl alcohol. During combustion, smoke and soot are not emitted into the air. They can be used both in the house and in the apartment. According to the device, they are the simplest. No dirt, dust, smoke, smell, just pure heat. Bioethanol has the highest efficiency - from 80%. The flame is maintained by reaction with oxygen, there is no need to supply it additionally and lay ventilation.


- Gas(according to the principle of operation, they resemble gas stoves). They are the most economical in maintenance.
- With water circuit(similar to centralized heating). Very difficult to arrange, but cover the maximum area for heating.
- Electrical(similar to heaters). Unlike heaters, they are deprived of mobility, but they are aesthetic in appearance. The heating radius is small, energy consumption is large.


The classification according to the installation method depends on the location of the heating device inside the room. There are few options: island (in the center of the room), built-in (walls recessed inside), wall-mounted, corner.


The island fireplace, as a rule, becomes the central element of the design composition. The whole interior is built around it. The element is certainly beautiful, but ineffective. Island more often are electric and eco-fireplaces.
Structurally, this is just a heat-resistant base on which a fire is made.

The perimeter of the base can be fenced with glass or grating. The second option requires special safety precautions. Above the base is a smoke box and a chimney.
The base with a protective fence can be one-sided (when the fire is visible only from one side, the rest of the walls are “deaf”), two-sided (view from several sides, often opposite), three-sided, overlooked from any point.
Built-in fireplaces are either "recessed" into a thick wall or built into a column. All structural part is completely hidden. This saves space and gives the fireplace an aesthetic appearance. A common type of built-in fireplace is a cassette with a closed firebox. The firebox is closed with a glass door so that the device does not lose its aesthetic function.


A built-in fireplace is good when laid immediately when planning a house. Otherwise, it runs the risk of becoming the most time-consuming to manufacture, since a niche of the required size will have to be cut through the wall.
Wall fireplaces protrude completely into the room. This limits the scope of their use to medium and large-sized rooms. This species also has its advantages against the background of others. This is the ability to install it at any time, even after the completion of the construction of the house, and the variability of design. There are no limits to the ways of finishing and decorating.
Corner fireplaces are not widely used in a modern interior. Now they can only be found in the houses of the old fund and apartment-type museums. Meanwhile, this is one of the most practical types, since its location allows you to heat two adjacent rooms at once. And the placement method significantly saves usable space in the room. The design idea is also not limited to the location.


Suspended view limits the choice of fireplace according to the type of fuel.
Due to the large dimensions and weight of solid fuel and gas structures, they cannot be used in a position separated from the foundation. The water circuit also does not fit. There are only two varieties - alcohol and electric.

They are lightweight, and the absence of a chimney makes it possible to place them absolutely anywhere. Often he occupies a central or near-wall position., since its compactness and design features are conducive to this. In shape, such a fireplace can be rectangular, and oval, and round, and square, and whatever the design idea wishes.
By appointment, two types of devices are distinguished: functional and decorative.
Both features can be present at the same time.


Functional include fireplaces for additional space heating, devices with a culinary function. They are relevant for a country house, country cottage, attic floors of an apartment building. Electric and alcohol - for apartments with a cold first floor.

It is customary to rank as decorative:
- Lzhekamine, which has only a mouth with a non-working firebox. It is equipped solely to maintain the design in a certain style. Often this is a wall or corner structure with the most realistic device. It is not mobile, it is used in apartments and warm cottages, but not in a cold country house.
- False fireplace. It differs from a false fireplace in that the design is temporary. It is mobile and made for the occasion. For example, to decorate a living room for the New Year, for a themed family photo shoot. In fact, these are simple decorations made of wood, chipboard, plywood, plastic and other improvised materials. These include even ornamental materials for children's puppets or a puppet show at home or in the theater.


The classification of fireplaces by design is the most diverse and requires detailed consideration.
Style and design
The architectural and artistic value of a fireplace in an interior is often more important than its functional purpose. Such an element of decor can turn a laconic or unrecognizable at first glance interior style into an exact match to the concept, add zest to it. At the same time, the variety of styles is great - from the unchanged classics to techno.

Classic
Classicism is synonymous with specularity, clear proportions and lines. He refers to the first versions of fireplaces, by the time when they were already firmly established in the homes of different segments of the population and became widespread. The materials of the internal arrangement must be chosen based on the functioning of the fireplace, but for the external decoration of the portal, good-quality and natural products are shown. The more expensive and better they look, the better they fit into the classic framework..
A real classic is not created from fake and cheap materials. At least on the outside they should look expensive. Actual to make the mouth of solid wood, marble, stone. He is massive. The upper part of the portal is so wide that it serves as a finished shelf. Lamps, clocks, figurines, jewelry are placed on it.
Marble and wood portals can have a geometric shape, or they can be decorated with carvings.


It's important not to overdo it. The abundance of decorative elements at the mouth of the fireplace is no longer included in the concept of the classical direction.. This is the prerogative of pompous styles in the spirit of baroque, rococo and romanticism. They are often referred to as a group of classical styles, but it would be more correct to single them out as a group of historical trends. Classics in this case acts as an independent offshoot.
Its typical representatives are English and Victorian styles. The "highest point" of the development of the classics is the Empire style.

Baroque and rococo have a place in some modern interiors, but they have already lost their former solemnity and splendor. Palace interiors are too difficult to transfer to the conditions of typical apartments and small cottages. The white and gold scale and complex decorative elements look too pretentious and out of place in everyday life. Their relevance remains only for rooms with a large area.
In urban life, a fireplace is rarely used for heating.
Its arrangement is a decoration, a snag to achieve the desired atmosphere in the setting.

Russian
It can safely be called a separate art form. Russian-style fireplaces try to look like tiled stoves, and a tiled stove is the main decoration in the house. This is an abundance of relief patterns and colorful drawings. The motives for the plots are nature, flowers and fruits, myths and legends, fairy tales, needlework (lace, wood painting).
The tiles themselves are small tiles, the predecessors of tiles. They are made of porcelain, faience and clay. The tiles are repeatedly fired and covered with transparent enamel and gold-containing paints.
Each fireplace in the Russian style is created only in one copy and is a symbol of originality.


It becomes a central element in the interior, everything else adapts to it. The location at the same time is common in the corner and near the wall. To maintain a sense of authenticity, a Russian-style fireplace is better to choose solid fuel or gas with a closed firebox. Suitable for electric shield with high-quality imitation of burning firewood.
This style has three dominant directions: the “a la russe” style (common in Europe, depicts the vision of Russian interiors in wealthy houses by foreigners), “antique” (interpretation of old interiors using modern materials), Russian tower (variations on the theme urban Russian style).


rustic
This direction is identified with simple, solid, but primitive rustic interiors. It is characterized by the use of natural stone of rough processing, the absence of sophisticated decoration of the portal. A characteristic feature is an open firebox. Such a fireplace should be wood-burning, with live fire, crackling wood and the smell of wood.
For interiors that are alien to emphatically naturalistic rustic, there are its offshoots. They are more accurate and allow decorative elements made of metal, wood, a closed firebox, electric screens. These include country, Scandinavian style, Provence, chalets. All areas that support the use of natural materials in decoration.


Modern
This name unites many directions, which have one characteristic feature - the renewal of art. Heavy beauty and pretentiousness fade into the background.
The Art Nouveau (or Art Nouveau, Art Nouveau, Liberty) fireplace may retain eclectic features and decor, but it is kept to a minimum. Begins to practice the combination of different materials. At the turn of the XIX-XX centuries, Art Nouveau became a prerequisite for all modern styles.


Modern directions
Collective name for different directions. Here there is a rough industrial loft, and a kind of contemporary, and strict constructivism, and metallized hi-tech with its closest relative - techno. Distinctive features of modern fireplaces: an abundance of glass, iron, chrome and mirror surfaces, laconic shapes, small sizes. Geometric shapes predominate.
Modern style fireplaces are often built in to save space.


There is no decorative frame in the form of a figured portal, it merges with the wall. Actual biofireplaces that do not require the organization of a chimney.
Fireplaces-decorations are a common phenomenon. Such fireplaces are made from materials that are easy to process, such as PPU and fiberboard. For the 3-D effect, materials with a large sheet thickness are used. They serve as a New Year's decoration in the living room, bedroom, photo studio. On an ongoing basis, such a fireplace is difficult to make of high quality. It looks fake and too cheap.


Necessary tools and accessories
The set of tools, materials and accessories for creating a fireplace varies depending on its type. The process of making a real fireplace with a working firebox is the most time-consuming and complex. The easiest way to make a false fireplace as a decoration.
For the manufacture of a working fireplace on solid fuel, gas or a water circuit, the list of what is necessary does not begin at all with the choice of materials, but with a more important and complex thing - paper design. Theoretically, a fireplace is a fire hazardous element, especially with an open firebox. Therefore, before sitting in an armchair and listening to the cozy crackle of firewood in the fireplace, you will have to spend from 3 months to six months on knocking on the thresholds of various authorities and obtaining permission.
This process is problematic because, at the legislative level, the construction of fireplaces is allowed in limited types of housing.


These are pre-revolutionary buildings, in which there is a channel for removing smoke separate from the ventilation. Also in a private house, you can get a building permit, subject to safety regulations. At the same time, in the documents, in no case you cannot specify an open hearth fireplace as such. It is prohibited by building codes.. But to arrange it as a transfer of the heating system is quite realistic. Without specification, it will be considered a stove with a closed firebox, and its construction is not yet prohibited.
The registration procedure begins with the development of the project, and it is carried out by an authority that has a license for such activities. The next step is to assess the operational condition of the dwelling. The main thing in it is the serviceability of the chimney and its revision no further than six months from the creation of the project.


After the assessment with the project, you need to visit the licensed departments of the Ministry of Emergency Situations. This institution must put its visa on the project. If it is not there, the project is sent for revision until it meets all fire safety requirements.
In addition to the Ministry of Emergency Situations, you must obtain permission from the fire department. After that, work can begin. Upon completion, they will be accepted by a special commission, and the changes made will be recorded on the plan of the house.

Directly for construction you will need:
- Mortar for pouring the foundation and fittings. With a large weight of the entire structure, the foundation must be reinforced with a steel grate so that cracks do not go.
- Two sheets of iron 15mm thick. One is laid directly on the foundation, the second is laid on top of the waterproofing with an offset of 100-150 cm.
- Two sheets of ruberoid. They perform the function of insulation between galvanized steel sheets.
- Brick. Regardless of the front finish of the fireplace, its hearth is laid out from red ceramic bricks. They can also trim the chimney along the inner contour. Particular attention should be paid to the "undercut" - bricks fitted to a non-standard shape and size. The material must be free of cracks, defects, burnt dark areas. It is quite resistant to fire and will last for many years.


- Fireclay plates. They are laid out under the firebox. The material is refractory and designed specifically for stoves and fireplaces.
- Clay-sand mixture for masonry. It is allowed to use only pure building clay and alluvial river sand. The proportions of the components of the mixture are 3 parts of sand to 1 part of clay. Cement and alabaster mortars are not suitable. The clutch will not hold. Together with the container for the mortar, you need to purchase a construction mixer, a mortar shovel, a trowel and a rule.
- Also needed: smooth, even formwork boards, asbestos cord, grinder for fitting bricks to size, drawing and measuring tools, a plumb line and a level, a trowel, a construction stapler, shovels, a hammer with an iron nozzle and with a rubber one (for leveling the masonry).
- Additional elements: a grate, ventilation pipes and grates, an ash tray in an ash pan, a protective screen against sparks and coals, a poker and decorative elements. In a simple design, this is a fireplace portal or mouth.


Electric hearths are installed according to a simplified scheme. Since they do not require a chimney and are no more of a threat than a conventional heater, no permit is required. Bypassing the paperwork, you can immediately begin to equip the fireplace.
By itself, the electric fireplace is quite light and does not heat up to high temperatures.

To install it, you will need a frame made of a metal profile, sheathing sheets, finishing materials for seams, material for decorative finishing and related small things in the form of self-tapping screws and fasteners for connecting the frame to the wall. You will also need cutting tools, a drill or screwdriver, measuring and drawing accessories.
False fireplaces require drawing materials, cutting tools to cut out details, fasteners in the form of screws or liquid nails, paints, stabilizing elements (so that the structure does not collapse), decor.


How to do it yourself?
The manufacturing technology of the fireplace depends on its type. Fake fireplaces are easy to make. The hardest thing is to build a real, working fireplace with an open firebox. We do not consider options with gas heating and a water circuit at all, since their arrangement requires the intervention of specialists. Not even a tutorial video can help. Incorrectly connected gas equipment or a boiler can lead to serious damage to the house and even become a threat to the life and health of its inhabitants.
Before starting installation work, it is important to carry out several preparatory procedures. As a rule, this is paper design, calculating the dimensions of the fireplace, choosing the materials from which the “body” of the fireplace and its mouth will be made, choosing the shape of the portal, the color of the exterior and decorative design.


Dimensions
Calculating the dimensions of the furnace is the most important design stage. It is carried out relative to the dimensions of the heated room. It is conditionally possible to divide all fireplaces into mini, medium and large. Mini fireplaces are designed for rooms of 10-12 square meters. A small fireplace will have a firebox 400-420 mm wide, 420 mm high, 300-320 mm deep. These are the dimensions typical for a stove. The shape of the firebox is narrow and elongated or square.
Another kind of small fireplaces is designed for rooms with an area of 13.5-15 square meters. m. The width of the firebox is 450-500 mm, the height is 450-490 mm, the depth is 320.
The height of the smoke box for small fireplaces is 570-600 mm.


Medium-sized rooms of 18-25 squares need fireplaces with a portal size of 600-700 mm. Recommended height - 560-630, depth - 320-350. The optimal height of the smoke box is 630-660 mm. The shape of the firebox of such a fireplace is square or rectangular, with a longer horizontal side.
For very spacious rooms of 30-40 squares in area, a fireplace with WxHxD parameters equal to 800-900 mm x 700-770 x 400-420 mm is required. The height of the smoke collector is not less than 700-800 mm.
The vertical of the back wall should not be less than 360 mm for all types of fireplaces. The minimum section of the chimney is 140 mm.

More accurate calculations are made according to the formula. So, to determine the size of the firebox, you need to divide the total area of \u200b\u200bthe room by 50. At the same time depth in relation to height has a proportion of 2:3. Too deep a furnace lowers the already not very efficient heat transfer during fuel combustion. All the heat will go along with the smoke to the street. A small firebox, on the contrary, will cause some of the smoke and soot to settle in the room.


materials
The firebox and chimney are almost always made of the same material - red ceramic bricks. The brick is hollow and solid. Whole is more suitable for a fireplace. It withstands high temperatures, does not crack, has no pores. For the foundation you need a concrete or cement mixture. Concrete is cheaper, cement is more practical. If cement, then 300 marks.
Before arranging the hearth, galvanized metal sheets and a layer of waterproofing and thermal insulation are laid. The base of the firebox can be additionally protected from cracking with the help of fireclay plates. Refractory refractory bricks are also suitable.
Heat-insulating material is a rolled cardboard impregnated with resin and sanded.


For example, only. In order for it to perform its function, it is necessary to lay it on mastic. The fireplace requires bituminous or tar mastic. Inside the chimney itself, metal pipes are used.
Brickwork should be a monolithic, durable and smooth structure. For "adhesion" of bricks, mortars of mineral substances, water and aggregate are used. Natural minerals are various types of clay, lime, cement and gypsum. The clay base is considered optimal. The role of the aggregate is played by high-quality fine sand. In conditions of constant exposure to high temperatures, mountain sand has proven itself better.


The finishing of the portal is more variable. There is no heat load on the mouth, there is no direct effect of fire, so the choice of materials is quite wide.

For the manufacture of the portal are used:
- Marble. The marble portal looks expensive, elegant, but not too pretentious. It is appropriate in classic interiors in combination with other elements of the luxury segment. Marble fireplace next to simple wallpaper or cheap flooring will look out of place.
- Granite. An impressive, massive granite portal will fit well into classic, Gothic and Scandinavian interiors. Like marble products, it requires an appropriate environment, but is more suitable for rooms in dark colors.


- Tiles. The most complex and expensive, but at the same time the most spectacular decor. With its help, fireplaces in the Russian style, as well as ethno-fireplaces, are embodied. Faience or ceramic tiles can be ordered ready-made and according to an individual pattern. The tiled mosaic will consist of a limited number of module parts. You can’t damage them, you can’t buy spare ones at a hardware store like cracked tiles. Finishing will require special tools and binders. It is better to entrust such a responsible event to professionals.
- Ceramics. Having experience with finishing materials, you can adapt ordinary ceramic tiles as tiled modules. The event is difficult, but the result is worth it.
- A natural stone. Stone decoration is the prerogative of such styles as rustic, country, chalet. This is an alternative to red brick, which fits perfectly into the atmosphere of a country house.
- Fake diamond. Performs functions similar to its natural counterpart in design, but costs less.


- Facing brick. This is a material for the exterior decoration of the portal, which has a different color, texture and texture. The range is large, up to bricks with mother-of-pearl sheen.
- Wood. The wooden portal differs in laconicism and dignity. Predominantly used dark wood of valuable species. Wood is appropriate in many interiors, from classic to Provence.
- Galvanized profile. Rough metal finishes are typical of Scandinavian castle-style rooms. It also has industrial features, so it will organically fit into a loft living room or studio. Beautiful forging, voluminous metal details and gratings are integral elements of decorating a Victorian fireplace.


- Gypsum. The mouth of gypsum is used when the fireplace portal should look like high-quality stucco. Real stucco will cost quite a lot, but a gypsum analogue is available even with a small budget. The decor can be either classical or more complex, for example, in the spirit of the Baroque.
- parquet board. It is used for finishing small fireplaces. A wide and high portal, which has a shelf on top, is already difficult to finish with narrow lamellae.
- Derivatives of natural wood. A beautiful carved portal can be made with your own hands and from budget materials. These include all types of plywood, non-laminated chipboard, fiberboard, OSB and MDF. All these materials are sheet materials, have a sufficiently large width and length to make a portal from a single fragment, and are easy to process.


When the furnace is closed, cast-iron doors or fire-resistant glass are usually used.


The portal for an electric fireplace is made in the form of a frame made of a metal profile and corners. The frame is sheathed with drywall sheets. Screws are used as fasteners.
As for false fireplaces, their portals are made from different materials in accordance with the idea. Volumetric portals look more effective from thick, "bloated" materials, for example, foam or polyurethane. A rigid mouth can be built from the same wood derivatives as for a working fireplace, as well as from timber and boards. Sheet drywall and improvised materials are actively used. Old furniture can do a great job.
Putty, liquid nails, painting tools are useful for sealing seams.


For decoration - brushes, paints, self-adhesive film, finishing primer. The rest of the elements are optional. The mouth of the fireplace can be silver, gold or mother-of-pearl, have voluminous details and depict natural marble.

The form
The location of the fireplace in the room (in the center, in the corner or against the wall) determines the amount of building materials. The form also matters. The shape of the firebox and the shape of the portal may differ. So, laying out a round fireplace is more difficult than a square one.
The firebox itself inside is square, rectangular, pencil case, semicircular and round.
Modern fireplaces also have an oval and triangular shape. The smaller the fireplace, the easier it is to choose the size. Large fireboxes impose some restrictions. The best option is a rectangle elongated vertically.


The form of the exterior finish of the portal is a purely aesthetic issue. It most often happens in the form of an arch with a shelf on top, a figured edge, carved decor. The arch can be rounded or elongated upwards. The arches protruding forward in a semicircle look interesting.
Colors
The color palette is determined by the type of finishing materials and is usually limited to natural colors.
Gypsum is classically white. It goes well with golden decor.
Marble can be plain (white, black, brown, gray, beige) or bicolor (a combination of different shades with white, black and gray). Extremely rare is a green, pinkish, bluish stone with colored veins of the same shade. Natural marble is chosen in gray and brown colors, less often - milky.


Facing bricks are presented on the market in a variety of palettes, but a limited number of colors are used: terracotta, brown, black, white, gray, chocolate, ivory. It is also presented in combined versions and with mother-of-pearl coating.


Wood and its derivatives are selected for painting.
Popular light shades, brushed (aged) dark wood, natural dark wood. The most popular are walnut shades, teak, wenge.
Decoration with tiles is not limited in the palette. This type of finish is available in a riot of bright blues, reds, yellows and more.


Step-by-step instruction
Stages of manufacturing a fireplace with a working firebox:
- Drawing development, calculation of the amount of materials.
- Purchase of materials and tools, work uniforms. During the work, you will need a respirator and goggles, since laying a chimney in the wall (ceiling) is dusty and dirty.
- Preparatory work. At this stage, a pit is dug out (hollowed out in the old foundation) for a fireplace, covered with a gravel-sand mixture. A waterproofing material is laid out on top of the rubble, and the foundation is poured on it. It is reinforced with metal mesh. The drying time of the cement mortar is 20-30 days.
- Solution dilution. This is a long procedure, since the clay should get wet within 2-3 days. Then sand is poured into the clay solution. For 8 parts clay, 8 parts sand and 1 part water. The mixture is thoroughly mixed with a construction mixer until the consistency of sour cream.


- Fireplace masonry. The first two rows are laid out without features, with a gap of 5 millimeters. This is the base of the fireplace. The third row is the bottom of the firebox. It must be laid out with fireclay plates placed on edge. You can not alternate with other material. Here the grate is installed. It is important to take into account that iron expands more than brick when heated, so temperature gaps are needed. The fourth row is the beginning of the formation of the combustion chamber.
If there is a blower in the design, it is installed in the process of forming the fifth row.
Up to the eighth without any features, and from it the formation of the forward inclination of the back wall begins. The slope forms a "mirror" to reduce heat loss. Rows 9-15 form an arch, 15-18 - "chimney tooth". From 19 to 20, a channel for the removal of smoke masses is formed. From 23, the outlet expands, contact is formed with the roof (wall, if the house is higher than 1 floor). The chimney is brought out and protected by an "umbrella" from precipitation.

- Wind vane installation.
- Sealing the fireplace cement mortar. After that, the structure should dry out a little.
- decorative trim. Before it starts, the mortar in the masonry must dry completely.


Making an Electric Fireplace Easier. At the first stage, a frame of the desired shape is assembled from a metal profile, the base of the frame is sheathed with a material resistant to high temperatures. At the second stage, the rest of the structure is sheathed with drywall. On the third, the seams are smoothed out with putty. Fourth - decorative trim. Fifth - mounting the frame to the wall. The sixth is the installation of an electric fireplace in an impromptu firebox.
False fireplace for a New Year's photo shoot and decorations, you can make it from wooden battens, sheathe it with fiberboard or drywall, plywood from old furniture. It is not attached to the wall, so that after the holidays it is easy to remove it without damaging the wall decoration.

Little tricks for creating the perfect fireplace:
- It's worth starting with a sketch. This will give a visual representation of how the fireplace will look in the interior.
- The fireplace is located at a distance from doors, windows and heating appliances.
- Finishing the fireplace should be in harmony with the style of the interior or set the tone for it.
- Before starting the construction of a solid fuel fireplace, it is recommended to protect all surfaces as much as possible from cement dust, and move the furniture to another room.


- Numbered bricks are faster and easier to lay.
- The brick must not be hollow.
- It is not recommended to build a hearth in the off-season and in the cold season.
- A solid fuel fireplace requires maintenance and periodic cleaning of the chimney.
- The best option for an apartment is alcohol fuel.


Beautiful examples and options
The beauty of a homemade fireplace is determined by its location and type of finish. A win-win option is a portal made of concrete or marble. It looks expensive and for a long time retains a presentable appearance of wood trim.
In a private house, a fireplace with a country or rustic stone finish, as well as a Russian antique style and tiled finish, organically fit in. In the interior of a modern apartment, an electric or eco-fireplace of a non-trivial shape with metal and tempered glass trim is appropriate.


The dream of every summer resident is to have a fireplace in his living room. The Internet is replete with numerous schemes of fireplaces, you can choose any model, any orientation and style. But at the same time, when calculating the cost of consumables and work, the price can reach a fabulous amount! Often, an ordinary summer resident does not have such money. How to be?
Fireplace in the country
Let's look at how to make a fireplace with your own hands - the cost of consumables will be about ten thousand rubles, and you will do the laying process yourself. Consider the construction of a fireplace - economy class.
Step 1 - prepare the material
For laying a fireplace, we need:
- 500 pieces of brick brand M-150
- 50 pieces of fireclay (refractory) bricks
- five bags of masonry mortar
- glass-magnesium sheet 12 mm thick
- fireplace door
- chimney made of sandwich panels 3 meters long (three elbows)
- oven tape for fastening fittings
- eight metal corners 50 mm
- chimney flue.
Here is the listed set of necessary building material, which will cost you no more than ten thousand rubles.
Step 2 - preparatory work
If a stove or fireplace is placed in a non-residential area, then you can ignore the possibility of dirt that occurs during the construction process getting on surrounding objects. You can clean them up later. And clean up the workplace after the completion of construction work.
Working in a residential building is always responsible for the safety of furniture, flooring and ceilings. Therefore, before making a fireplace with your own hands, it is necessary to cover all pieces of furniture, the floor with plastic wrap and, if possible, reduce the space of the workplace.
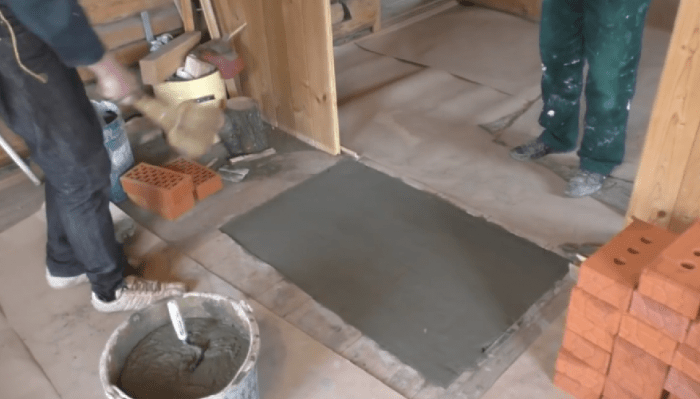
Step 3 - prepare the base of the furnace
The ground on which the house stands is very heaving. In addition, the house is old, but still quite strong. Unfortunately, we were not able to make a deep foundation for the fireplace, so we decided to protect it from spring swelling of the soil by placing metal corners under the first row of the fireplace base.

We lay metal corners parallel to each other on the foundation pillow so that the bricks are laid parallel to the interior partition.
Be sure to leave gaps between the bricks to fill them with cement screed.

The corner should be doubled so that the bricks in the masonry form a solid foundation for the fireplace. It is best to weld the corners to each other to prevent their displacement relative to each other.
After the metal corners are placed and the bricks are laid in them, we fill them with cement mortar on top and level the mortar - it is used with a “grater” for plastering. The density of the solution required for these works is approximately comparable to thick sour cream. This is enough for it to penetrate into all the grooves between the bricks and at the same time not leave the seams. Excess water in the solution will lead to its sponginess and, as a result, to its cracking.
In addition to the fact that the plinth plays the role of a fireplace frame, it also aligns the “horizontality” of the structure with its help. Do it mainly with a solution. After laying the basement, you need to give two days for it to fully seize.
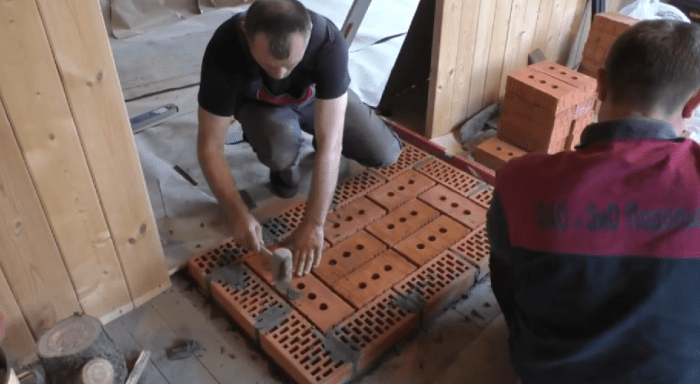
Step 4 - lay out "under" the fireplace
The “hearth” in the stove is called the first rows of masonry. These are the starting lines. Therefore, they are subject to special requirements. The first row must be clearly measured in such a way that its base is a rectangle with the same diagonals. All subsequent glads will be installed on it in the future. The fireplace in our case, the economy option will not have long air ducts. It will consist of a blower, a combustion chamber, a chimney casing and an exhaust pipe.
The fireplace will be hollow, there will be an air pocket between the combustion chamber and the outer walls. Therefore, the ceramic brick will not come into contact with the combustion chamber and for work we are quite satisfied with M - 150. The length of the fireplace is 125 cm, the width is 85 cm.

The starting row of the fireplace has been laid out. Please note that it is laid out dry, without mortar. This is necessary in order to roughly lay out the bricks in such a way as to see where and how much to fit when laying.
To increase the decorativeness of the masonry, bricks were made with oval corners. I wrote about this in the article " Laying the furnace". To make a fireplace with my own hands, I propose to do this - spend the first day of work on preparing the material, and only then proceed to the masonry itself. This is necessary for two reasons. You are not distracted by extraneous matters, and secondly, all the “very dirty work” is done at the preliminary stage.

We lay out the "under" for the base of the fireplace. We lay out the ash pan and blower. The outer row of masonry, after laying the grate in the prepared groove, is planted on the mortar.

We fix each row of masonry according to the indications of the building level.
The interior partition is made of sandwich panels. It is made of non-combustible materials, and therefore we made a minimum additional thermal insulation for the fireplace in the form of a vertical board covered with basalt cardboard and attached to the cut.

On the second row of masonry, we leave a place under the fireplace door. All joints in brickwork must be made in the middle of the row, and not at its edge.
Step 5 - lay out the firebox and install the door
Remove the glass from the door before you install it in the fireplace. This will help you avoid unforeseen expenses for glass restoration in case of force majeure.
After that, using a regular twist, attach four pieces of oven tape to the door. Please note that this oven fittings is quite large (50 by 50 cm) and for its fastening it is necessary to have a large length of the oven tape - at least half a meter at each corner.

Installing the fireplace door. We hide the lower oven tapes in rows, under bricks and grab them on self-tapping screws, immersing them in the masonry seams. We lay the sides with basalt cardboard to make the contact between iron and brick more airtight, otherwise iron expands more when heated than brickwork, and in these places the fireplace usually smokes a little.
We lay out the masonry in the fireplace in the form of a cropped letter V (without a sharp end). Fireplaces with such a chamber for burning wood quickly give off heat to the room. When making a fireplace with your own hands, pay special attention to the fact that not a single edge of the firebox should come into contact with the brickwork. Between them there should be gaps for convection air currents.

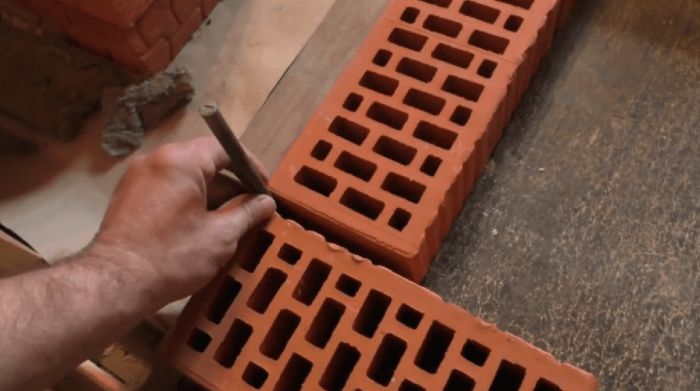
Start laying out the firebox. While all the bricks are laid without mortar. They are marked with their number and installed in the order in which they will be in the masonry in the future.

Numbering is visible on the bricks of the firebox.
Between fireclay and ceramic bricks at the joints (front wall) it is necessary to lay basalt cardboard in order to reduce heat transfer to ceramic bricks.

After the main rows of facing luggage are laid out, we proceed to laying the firebox on the mortar, while we definitely control the work on the horizontal laying.
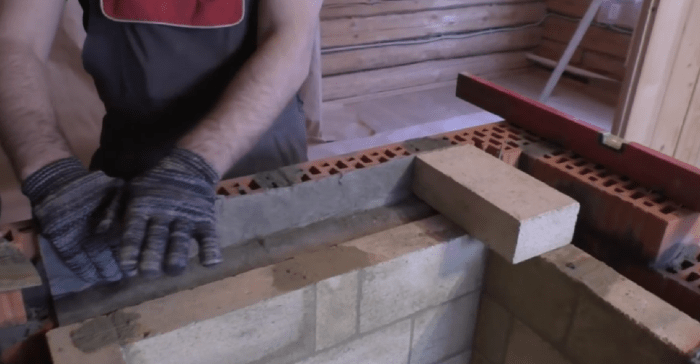
Four rows of fireclay bricks laid on the end approximately correspond to seven rows of laying ordinary bricks. Therefore, to the upper edge of the fireplace door, they approximately coincide. We mark the glass-magnesium sheet in size that matches the size of the air pockets of the fireplace and make an overlap of two centimeters on each side. We install it on the masonry in such a way that we get a flat surface that can be covered with a furnace solution. The glass-magnesium sheet can withstand temperatures up to 1000 degrees, so you can not be afraid for its fate.
We fill the pockets with a brick battle, tighten the upper edge with mortar, lay the LSU sheet and apply the mortar again. Now, when the fireplace is stoked, these pieces of brick, like stones in the stove heater, will keep warm.

The side pockets are filled, now we put a piece of LSU on the back of the firebox and lay three bricks on top of it so that there is room in front for smoke removal.

In front, behind the front of the door, we lay a metal corner and along it we lead the screed of the row above the door. It is in it that we hide the upper oven tapes from the door.

The approximate ordering of the row above the door, something interferes with the evenness of the masonry, you need to cut off part of the brick.
Step 6 - start laying the chimney casing
The chimney casing in fireplaces is not only a place inside which the chimney goes, but also an element of decor for the entire fireplace. On the third row of masonry above the door, we retreat by ¼ of the brick, so that through eight rows of masonry we reach the pipe masonry.


Eight rows of masonry and that's all - the casing is laid out, it turned out to be a very interesting element of the fireplace decor. There is a chimney inside.
The back wall of a fireplace at the same time is an interroom partition. We conduct its masonry very simply, raising the rows according to the jumper pattern with each other.

Installed a view on the pipe. According to many years of observations, I do not recommend laying it without a basalt cord, which plays the role of a non-combustible sealant.

The fireplace is almost ready, only fine finishing remains.
Step 7 - back wall of the fireplace from the side of the bedroom
To change the appearance of the masonry, we apply the brick aging method (it is described in more detail in the master class on laying a sauna stove). The bedroom will be covered with wallpaper with a brownish pattern, so that the stove does not look like a “blundery” spot, we use this method.

This is what the wall looks like from the side of the bedroom.
It turned out very stylish and beautiful! It remains to wait for the masonry to dry completely in order to enjoy all the beauty of the fireplace. We hope that this material will help you understand how to make a fireplace with your own hands, and you will be satisfied with your work and the result.
Throughout time, the main place in the house was given to the hearth. Recently, fireplaces in houses and cottages have gained great popularity, and the question of how to fold a fireplace with your own hands is quite relevant.
Any stove - fireplace must meet the following requirements:
- No smoke.
- Room heating.
- Beautiful appearance.
To achieve these goals, it is necessary to comply with all stages of construction.
Location
The very first step involves choosing the location of the hearth, not only saving living space, but also its effective heating depends on this.
First you need to decide on the type of construction.
Fireplace - stove can have the following options:
- Wall mounted.
- Angular.
- built-in.
- Island.
Based on this, the owner of the house can choose the right place for the fireplace.
When planning the location, it must be taken into account that it is not advisable to install a fireplace stove opposite the window, since the heat will go out the window. In addition, it is necessary to strictly observe the rules of fire safety, the fireplace is a source of heat, not a fire.
materials

Manufacture of fireplaces begins with the selection of materials. For construction we need:
- Red ceramic brick. Its quantity is calculated based on the prepared drawing, while all incomplete bricks must be taken into account as whole.
- River sand. Be sure to sifted and cleaned of dirt and litter. The grain size of the material should be within the normal range (0.2–1.5 mm).
- Crushed stone for the manufacture of the foundation. The allowable fraction should be from 2 to 6 cm.
- Blue Cambrian clay or plain red.
- Cement (M 200 or M 300).
- Smoke damper.
- Fittings.
Brick and its varieties
Throughout the entire period of furnace construction, a solid red brick is used, which is made of clay.
Such material spread the outer parts of the fireplaces. Therefore, a lot depends on the quality of the brick.
The brick must have the following properties:
- Have the correct shape;
- Do not contain cracks or dents.
- Have no deformations;
The inside of the fireplace is lined with refractory fireclay bricks or quartz material.
material quality requirements
When purchasing a brick, you need to pay attention to the following parameters:
- The material must correspond to a grade not lower than M200.
- The required amount of brick must be purchased from one batch.
- Appearance of a brick - it should not contain cracks, chips.
Training
This stage consists in the process of preparing materials. Particular attention, of course, is paid to the brick, but besides it, other components will be needed.

You will need a clay mixture, which is thoroughly cleaned of unnecessary impurities and wiped. Before laying, this mixture is soaked for about 2-3 hours.
The sand that will participate in the solution must also be cleaned, it will be enough to sift it through a sieve with small holes.
Having done this, you can begin to prepare the solution, the proportion of which must be strictly observed. Based on the fat content of the clay, the ratio of sand to clay should look like 1:1 or 1:2.
The resulting solution should not spread on the surface of the brick, but at the same time easily slide off it.
Foundation pouring
To fill the foundation base under the fireplace - the oven will need the following materials and tools:
- roulette;
- Bulgarian;
- welding machine;
- hammer + nails;
- board;
- fittings;
- cement (grade M400).
The first thing to do is formwork from edged boards. It must be securely installed and have a height of 8–10 cm. The reinforcing rod is laid in 19 cm increments, after which perpendicular rows of rods are laid. The joints of the rods must be seized by welding.
The solution must be poured in two stages. The first involves a layer of concrete of 4 cm, then it is necessary to lay the crate, after which the last layer is poured, the height of which should be about 6 cm.
In order for the finished foundation to be filled with no voids, the solution is slightly plowed with a free rod.
After that, the foundation must be left alone. The term of its drying can vary from 15 to 18 days, depending on the conditions of the location.
Fireplace masonry
This process is quite simple, after reading the article, you will learn: how to build a fireplace yourself out of brick? In order to perform the masonry correctly, it is necessary to strictly follow the construction plan.

DIY fireplace
The laying is carried out according to the following scheme:
- Several layers of waterproofing material are laid on top of the foundation base.
- For the first row, cement is added to the mortar, and the bricks are laid on the slats.
- The third row has small nuances, namely the installation of two pins, which will be needed a little later for the grate.
- In order to fold the fireplace - stove correctly, you must adhere to the diagram or drawing.
- To comply with the temperature regime in the future design, it is necessary to ensure that the outer wall of the brick fireplace does not come into contact with the firebox.
- To remove excess solution from the walls of the firebox, its surface is cleaned with a damp cloth.
- To improve the quality of heating, it is necessary to observe a small angle of inclination forward of the rear wall. For the side walls, an eversion is provided.
- To avoid the possibility of fire, it is necessary to take precautions and protect the floor in front of the hearth with a sheet of iron.
Folding the fireplace stove is half the battle, you need to make a smoke box.

The principle of its laying is to lay out bricks with a gradual overlap. Portal-type holes are blocked inside with jumpers, which can be made in several versions:
- arched,
- wedge-shaped,
- vaulted.
To correctly lay out the smoke box, it is necessary to observe its verticality. After you have crossed the ceiling with the roof, you can begin the construction of the pipe on the roof. This laying is carried out on a cement-sand mixture.
Observing these rules, you can easily design a stove - a fireplace yourself. Now it remains to deal with the chimney.
Chimney
If the chimney structure is made of brick, it is necessary to consider a foundation for it, or a steel frame that will abut against the main foundation. The chimney itself is located on the outside of the firebox and wrapped with thermal insulation material. The top of the chimney is sheathed with a sheet of steel or aluminum.

Using ready-made pipe sections for the chimney, special clamps are used as fasteners, with the help of which the structure is fixed to the ceilings of buildings. This version of the chimney can do without a foundation base.
Finishing work
In addition to the fact that the fireplace is a stove, it can be decorated with a colored stitching seam, the brick itself may be repainted in a different color. For these purposes, tempera or gouache is used.
Decoration for the corner version of the fireplace can be tiles or marble tiles, stone or decorative brick. If a desire arises, then the surface can simply be plastered or other decorative elements can be used.
The modern market offers a large number of elements for decoration, including wooden details. For security reasons, their use is not recommended.
The decoration is fastened with ordinary tile glue, and the decoration itself should start from the bottom of the fireplace, gradually rising.
If your fireplace stove already contains marble parts, it is recommended to cover them with cellophane to avoid scratches.
- For the firebox, you can use fireclay bricks, and, for lining, choose a material of a different quality.
- The design of the chimney can be made not only of brick, but also of special modules in the form of a metal or ceramic pipe.
- To reduce errors in the construction of fireplaces, it is recommended to use ready-made drawings, and not develop them yourself.
- When designing a fireplace, you can focus on built-in shelves or firewood racks, this will give the design a more aesthetic look.
From the above material, we can conclude that laying a fireplace is a fairly simple process. All you need is to follow all the instructions and recommendations, then the question is: how to build a fireplace? won't take you by surprise.
Video: How to make a brick fireplace with your own hands


